Rhinestone nail designs are small crystals or gems set onto polish to catch light and add texture.
One quality glue layer matters more than how many stones you use, since a single loose gem on Tuesday means a full redo by Thursday if the base fails.
A 4mm crystal on a ring finger reads classic; the same stone on a stiletto needs repair by day ten, the narrow tip too small to balance the glue surface.
1. Simple Rhinestone Accents
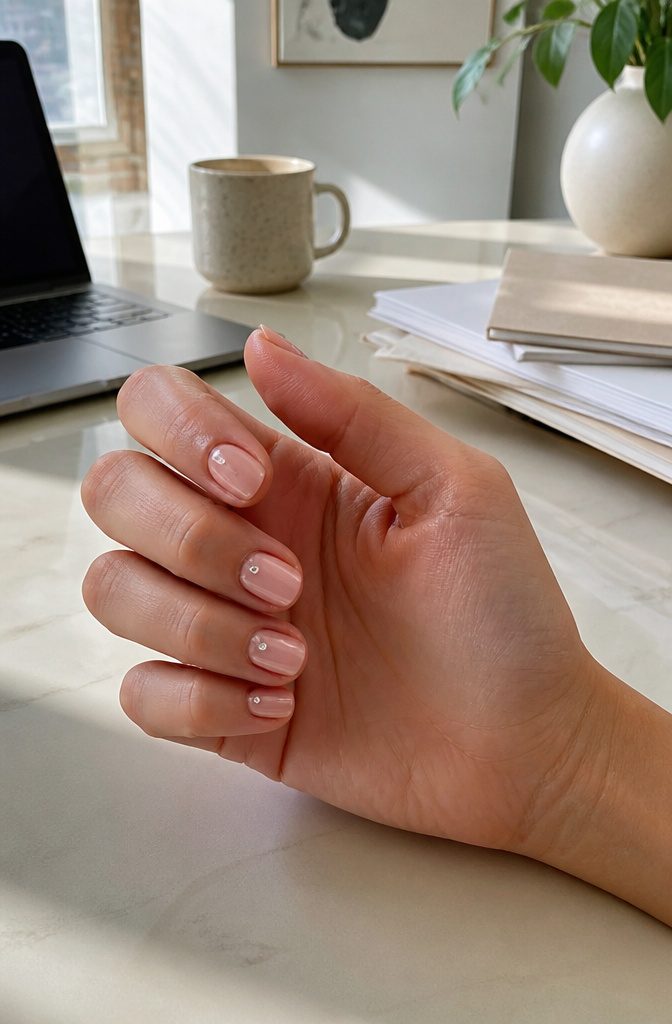
A single rhinestone at the cuticle catches light without catching attention. That placement, on nude or soft pink polish, reads as classic rather than flashy.
Two stones, spaced apart near the nail center, feel equally clean. Both versions pass in offices where full glitter would not.
Short nails carry this look especially well. The stones stay proportional, and a beige base keeps the whole thing neat enough for client meetings.
The conservative version uses just one tiny gem per nail, no cluster, no pattern. Less really is more here.
For anyone testing whether sparkle suits them at all, this is the practical entry point.
The commitment is low: if a stone loosens, one is missing, not a whole design. The style also ages better across a two-week wear cycle, since minimal placement shows grow-out less than edge-heavy layouts.
One quality adhesive layer matters more than the stone count; the difference between a Tuesday morning and a Thursday afternoon redo sits in how well that single gem is bonded.
2. Cuticle Rhinestones
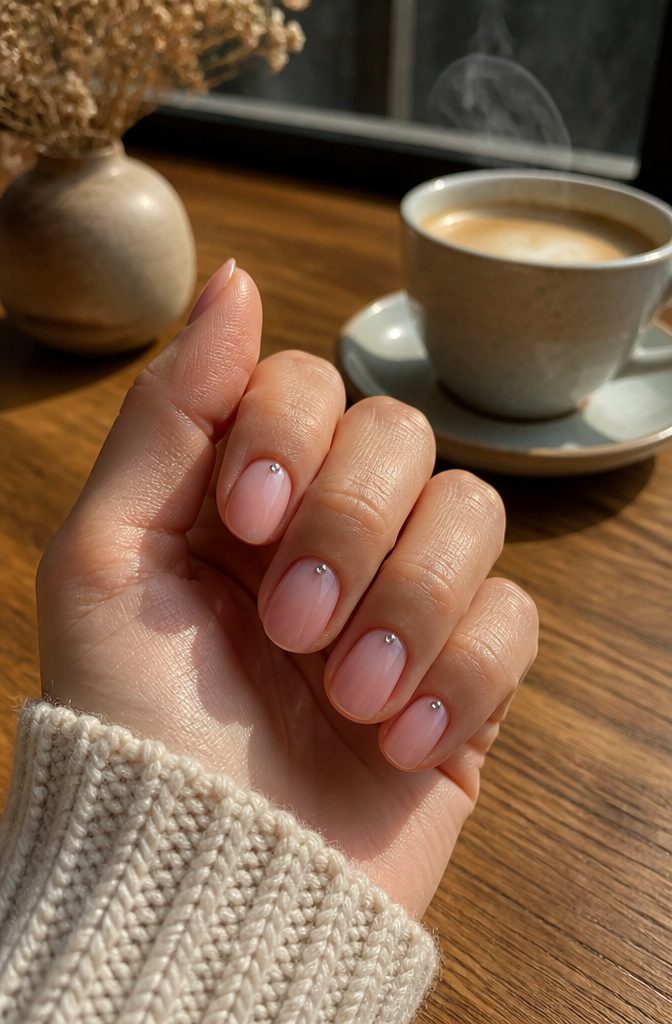
A single rhinestone tucked at the cuticle catches light the way a small earring catches light: enough to register, never enough to announce itself first. This placement does something smarter than full coverage ever manages.
It sits where the eye already travels when someone checks your hands, so the stone draws attention to the nail’s natural shape and the arc of new growth rather than competing with it.
I watched this effect on a client once, a trial run before a friend’s wedding.
She wanted sparkle that wouldn’t read as "prom" against a neutral ombre. We set one tiny crystal where the pink melted into the nude, right at the base.
The result felt finished in a way that bare ombre rarely does, and the stone’s position meant her short nails actually looked more deliberate, not more decorated.
The real advantage is restraint: a cuticle rhinestone asks the minimum of your daily routine.
No snagging on pockets, no lifting at the free edge where stones usually fail first. Sources treat this as a professional standard for exactly that reason.
Pair it with beige or soft pink and you have the look that appears across every "elegant simple" reference as the default move, the one that works at 9 AM and 9 PM without switching anything out.
3. Full Bling Coverage
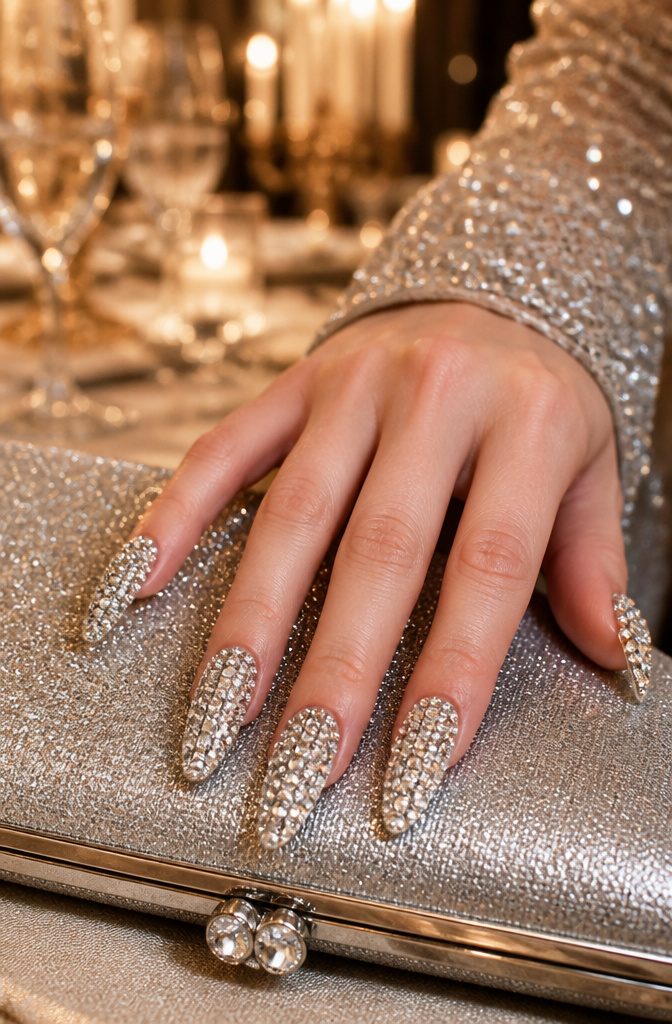
Full nail coverage with rhinestones sits at the far end of the drama spectrum, and five of the guides I looked at rank it as the most attention-grabbing option you can wear.
The look works when you want that level of impact: weddings, formal events, or any occasion where the nails themselves are the accessory. I would not plan it for more than a day or two of wear.
The maintenance load jumps sharply here. Every rhinestone edge catches on hair, fabric, and phone cases, and the glue that holds full coverage exposes more of your natural nail plate during removal.
Acetone soaks or careful dental-floss sliding take longer with full bling, and rushing it tears the top layer of nail.
Sealed stones still lift faster when they cover the whole surface instead of sitting as isolated accents, so full coverage needs more frequent touch-ups.
Press-on sets in this style sell precisely because most people want the photograph, not the Tuesday upkeep.
That trade is worth making for a single evening. For anything longer, the partial-coverage designs elsewhere in this guide hold up better between touch-ups.
4. Side-Lined Rhinestones
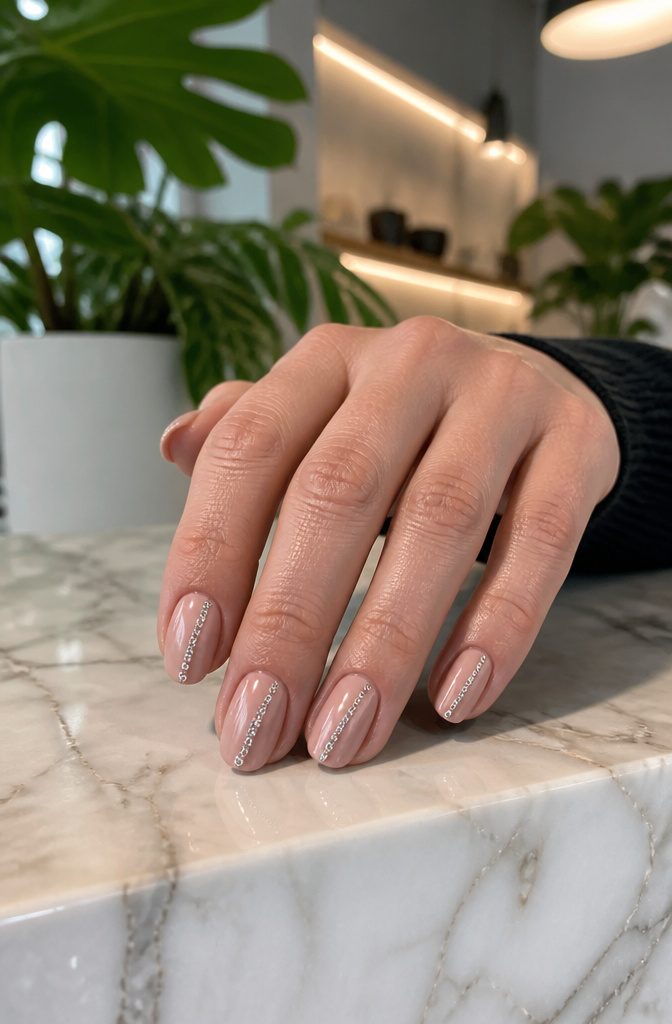
A thin line of crystals down one edge gives the nail a runway effect that flatters every shape.
I often see this on shorter beds where the eye needs somewhere to travel, and the stones create a vertical pull that makes the finger look longer without adding bulk.
The look works up a single side or both, keeping the rest of the nail open so negative space does the heavy lifting. Neutral pinks underneath, like a soft blush base, let the rhinestones read as jewelry rather than distraction.
A tonal match between your polish and your gems keeps the elongation clean so the line feels intentional, not spare. For anyone guarding their nail health or avoiding full coverage, this is the compromise that still reads finished.
5. Statement Gems
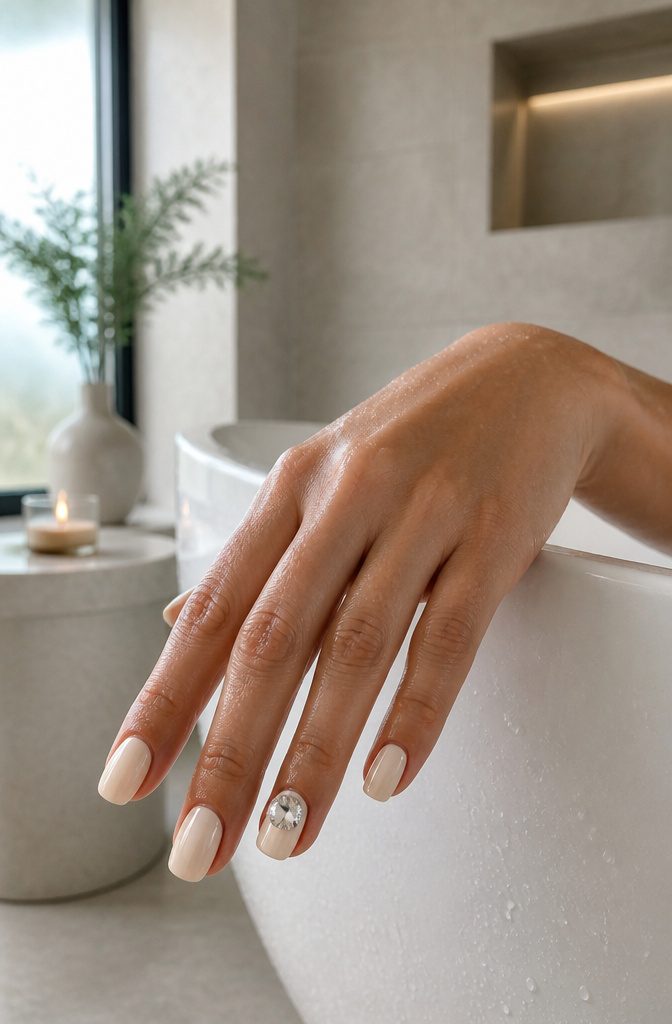
A single large rhinestone does more work than a fistful of tiny ones.
I learned that after swapping out a scatter pattern for one 4mm crystal on each ring finger. The nail went from busy to deliberate; the eye knew exactly where to land.
Placement is the decision that makes or breaks it.
Center the stone on a short nail and it reads classic, almost jewelry-box. Shift it toward the cuticle or tip, off-center, and the whole hand takes on an editorial slant.
Most sources suggest the ring or middle finger for emphasis, letting the other nails stay bare or carry a flat color so the gem owns the room.
A 3mm stone whispers; a 4mm stone talks. The jump between those sizes is the difference between an accent and a statement, and on a natural nail anything larger than 4mm risks lifting at the edges or catching on fabric.
One nail per hand is usually enough.
Two reads coordinated; three reads like the start of full coverage, which is a different section entirely. The real choice is whether to treat that single gem as a finish or a focal point.
Treat it as a finish and the color of the polish matters more than the stone. Treat it as a focal point and a nude or deep cream base lets the crystal do its job without competition.
6. Multi-Shape Dimension
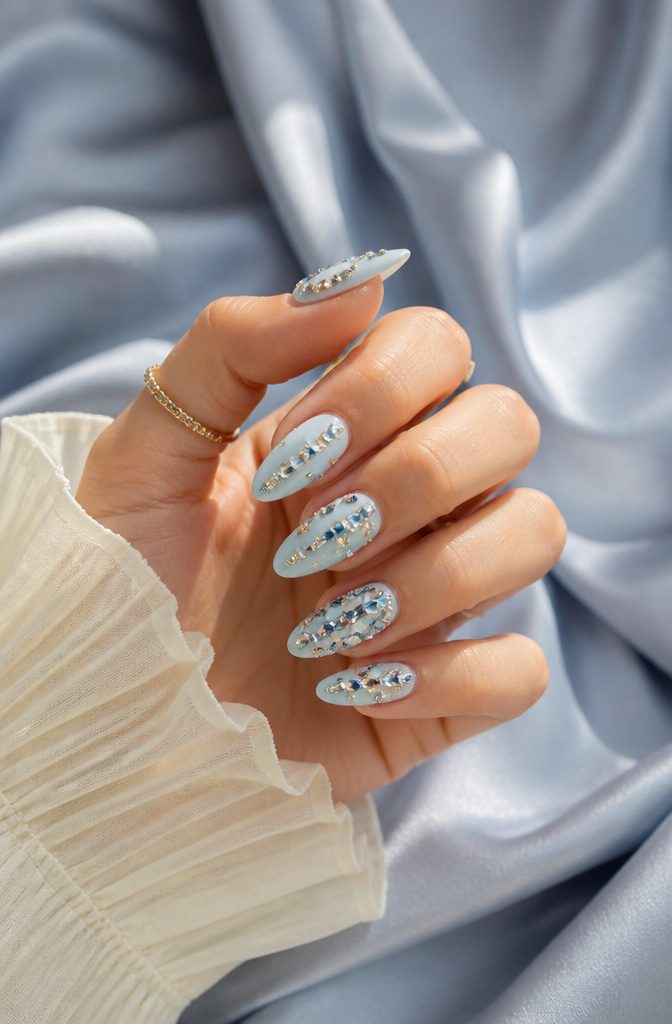
Laying every stone flat and even kills the effect; the shapes need to sit at different heights to catch light from more than one angle.
Dimensional nail art needs varying heights and mixed shapes to catch light the way the pros do.
Round, square, teardrop, and marquise rhinestones each throw light at their own angle; stack them at different elevations and you get shadowed valleys alongside bright facets.
A teardrop set on its side catches a window reflection differently than a flat-backed round sitting flush to the polish.
Marquise stones, with their pointed ends, draw the eye along the nail’s length and create natural ridges when paired with squarer cuts. The three-dimensional feel comes from this deliberate mismatch, not from quantity.
Four shapes in two or three sizes beats a dozen identical gems every time. Keep the color palette tight so the texture reads as design rather than clutter.
7. Pattern Enhancement
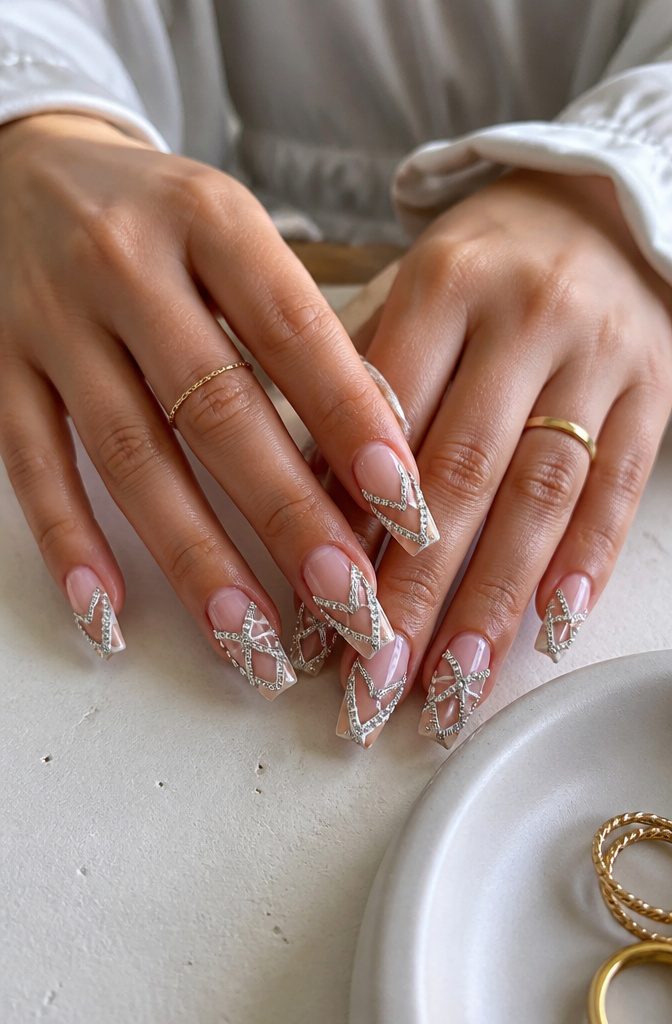
A single rhinestone at the tip of a snowflake arm catches light differently than painted white would. The facets break the nail into actual dimension, and raised texture gives flat patterns a pulse they lose in polish alone.
I learned this the hard way trying to draw a clean heart on my non-dominant hand. The line wobbled, the point smeared.
Swapping to a 2mm rhinestone for the outline and filling the center with smaller stones solved both problems: the shape held its geometry, and the slight lift off the nail bed caught shadow that made it read as deliberate rather than childish.
Geometric lines in particular reward this trade. A gold striping brush can lay down a straight edge, but it stays level with the base coat.
Substituting rhinestones for that same line builds a ridge you can feel under a fingertip, and the spacing between stones, chosen by eye rather than pressed by tape, forgives minor placement errors that tape would broadcast.
Butterflies work the same way. The body runs a line of graduated stones, wings get their vein structure from mixed shapes, and no two need match because the rhinestones vary in cut.
Sources vary on whether to layer over color or let bare nail show through the gaps. The color route reads more finished; bare nail reads lighter for everyday wear.
8. Center Line Placement
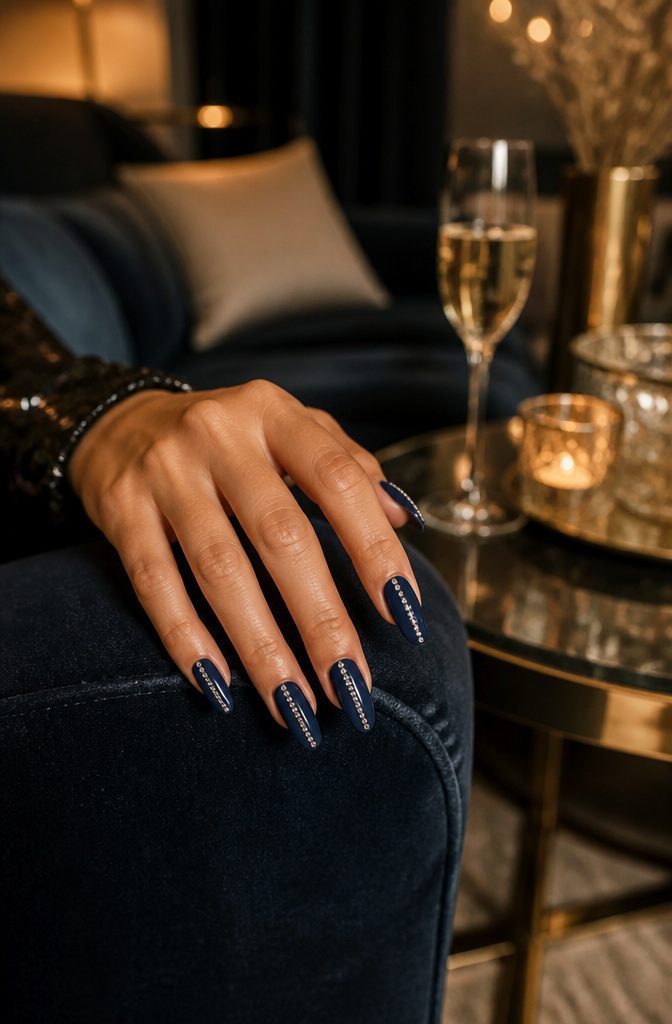
Center line placement draws the eye straight down the nail, which sounds simple until you try to keep the stones truly straight on a curved surface.
The curve across the nail bed means the center point at the cuticle and the center point at the free edge rarely line up vertically if you just eyeball it.
A thin striping brush with guide polish helps mark the line before any stones go down, and even then the spacing needs adjusting as the nail widens or narrows.
Almond shapes reward this layout more than they challenge it.
The gradual taper toward a soft point gives the rhinestones a natural destination, and the narrow tip means you can stop at three or four stones before the design starts to look crowded.
Coffin nails, with their squared-off free edge, need the opposite caution: the straight line across the top can make a vertical center line look like a crosshair unless you stop the stones short of the edge or soften the transition with graduated sizes.
Larger stones at the base shrinking toward the tip keeps the movement flowing; same-size stones all the way down fight the geometry.
Symmetry across both hands matters more here than with scattered accents. A center line that drifts left on the right hand and right on the left hand becomes obvious when your hands rest side by side.
Placing both hands palm-down on a flat surface to sight the lines together catches drift before the adhesive sets.
9. French Manicure Accents
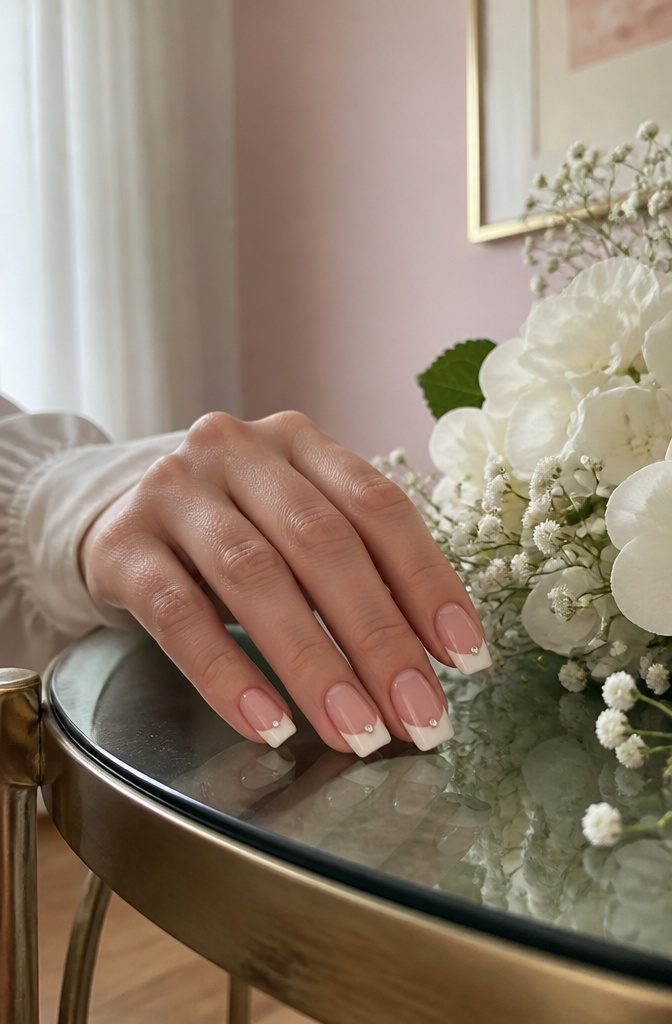
A single rhinestone tucked under the arch of a French tip takes a manicure from office-appropriate to wedding-ready without abandoning the classic shape.
The placement at the smile line is what keeps it elegant rather than flashy: one stone, not a scatter, positioned precisely where the white tip curves back toward the nail bed.
White French tips with this accent remain the bridal standard, and sources back their popularity for weddings specifically.
Colored tips shift the mood entirely. Black French nails with rhinestones read formal, almost evening; pink tips with rhinestones and bows lean coquette; blue tips feel fresh for summer.
The base color changes the story, but the stone placement stays the same. For brides, the winning combination is soft nude or white tips with pearls and crystals together, building a delicate, luxurious effect that still photographs cleanly.
10. Accent Nails
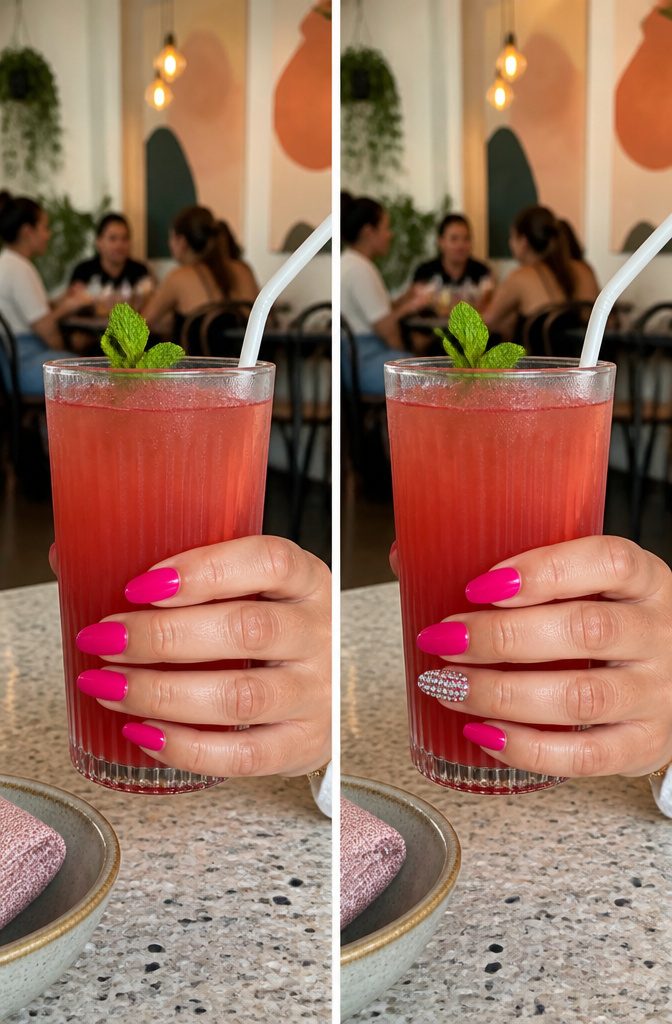
Loading most stones onto one or two nails gives you the look with less work and faster removal.
By keeping rhinestones to one or two nails, the plain polish on the rest acts as breathing room, and the gems themselves read as deliberate rather than overwhelming.
That restraint mirrors the 2000s pattern that put rhinestones on an accent nail to upgrade a look without rebuilding it entirely.
Whether used sparingly or to encrust an accent nail, the tiny gems were an easy way to upgrade any look.
For a reader returning to rhinestone nail designs after seeing them on Simone Biles at the Paris Olympics, this means you can try the trend tonight with ordinary polish and a small pack of stones, no salon appointment needed.
One nail fully jeweled against four in sheer pink gives roughly 80 percent of the impact with maybe 20 percent of the removal effort a full hand would demand.
11. Themed Designs
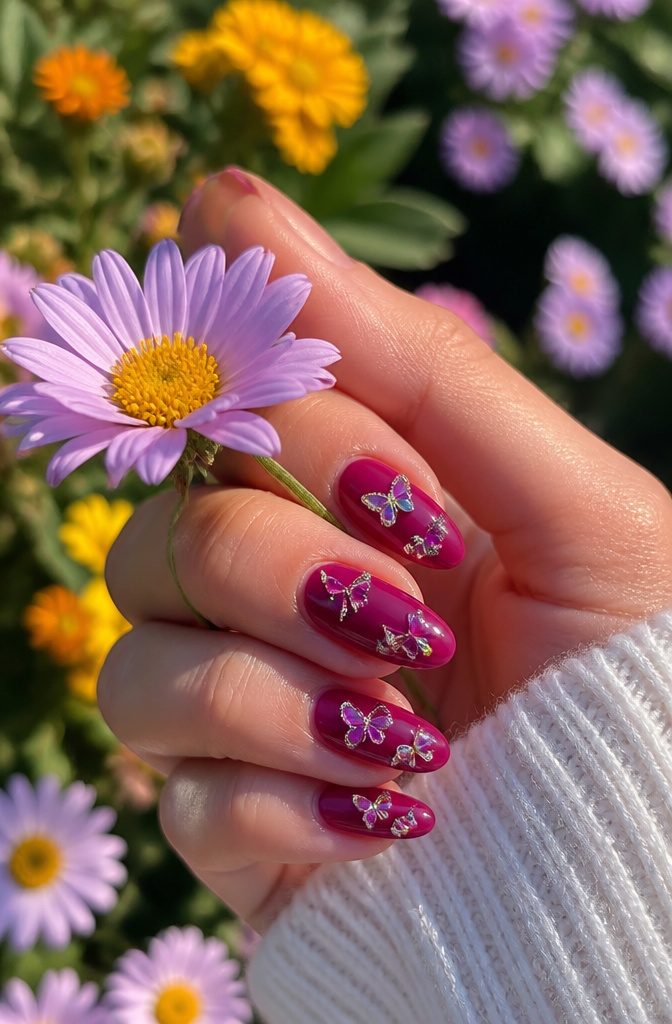
Butterfly motifs built from rhinestones landed on my radar last spring when the chrome base trend was everywhere, and pairing the two still feels fresh because the stones trace an actual shape rather than scattering randomly.
Fruit designs follow the same logic: a creamy berry-colored base with shimmering accents that match the hue reads intentional, not like leftover craft supplies.
Seasonal rhinestone patterns work best when the theme is built into the structure of the design itself.
Themed rhinestone nail designs date themselves fast, which matters for events tied to a specific moment and matters less for personal expression you already plan to change.
A Fourth of July firework pattern or a Halloween spiderweb tells everyone exactly which week you got it done.
That is fine for a party, awkward three months later. Fruit and butterflies carry less timestamp risk because they cycle back every summer, though 2023’s butterfly chrome specifically will read as 2023 to anyone who follows nail trends.
The safer play is choosing a motif you would wear regardless of what is trending, then building the rhinestone layout around it rather than copying the exact trending execution.
Application Steps
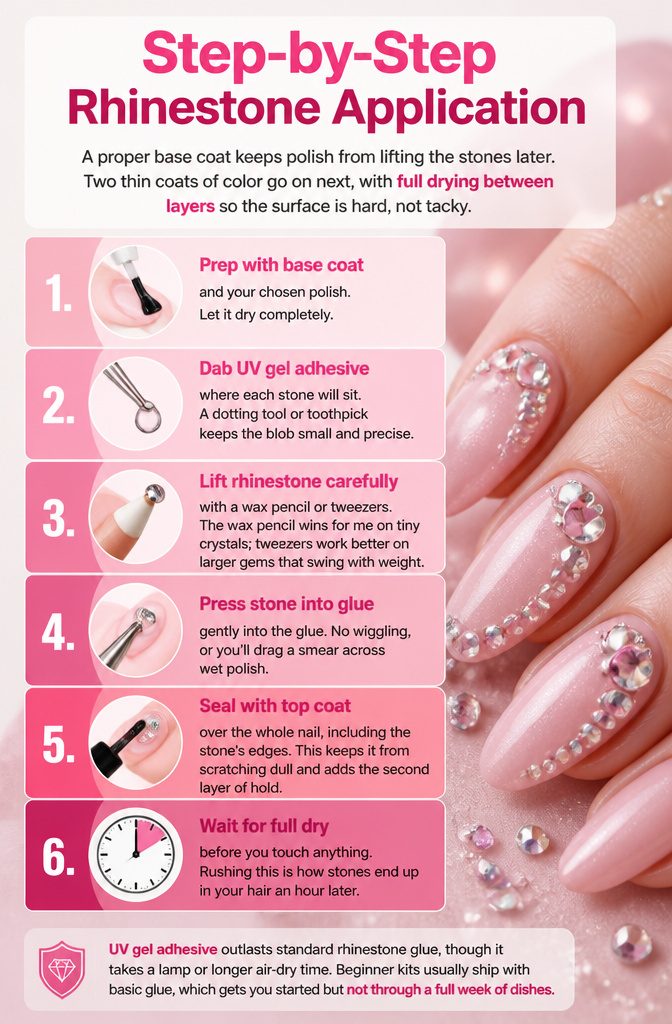
A proper base coat keeps polish from lifting the stones later. Two thin coats of color go on next, with full drying between layers so the surface is hard, not tacky.
- Prep with base coat and your chosen polish. Let it dry completely.
- Dab UV gel adhesive where each stone will sit. A dotting tool or toothpick keeps the blob small and precise.
- Lift the rhinestone with a wax pencil or tweezers. The wax pencil wins for me on tiny crystals; tweezers work better on larger gems that swing with weight.
- Press the stone gently into the glue. No wiggling, or you’ll drag a smear across wet polish.
- Seal with top coat over the whole nail, including the stone’s edges. This keeps it from scratching dull and adds the second layer of hold.
- Wait for full dry before you touch anything. Rushing this is how stones end up in your hair an hour later.
UV gel adhesive outlasts standard rhinestone glue, though it takes a lamp or longer air-dry time. Beginner kits usually ship with basic glue, which gets you started but not through a full week of dishes.
Tools and Materials
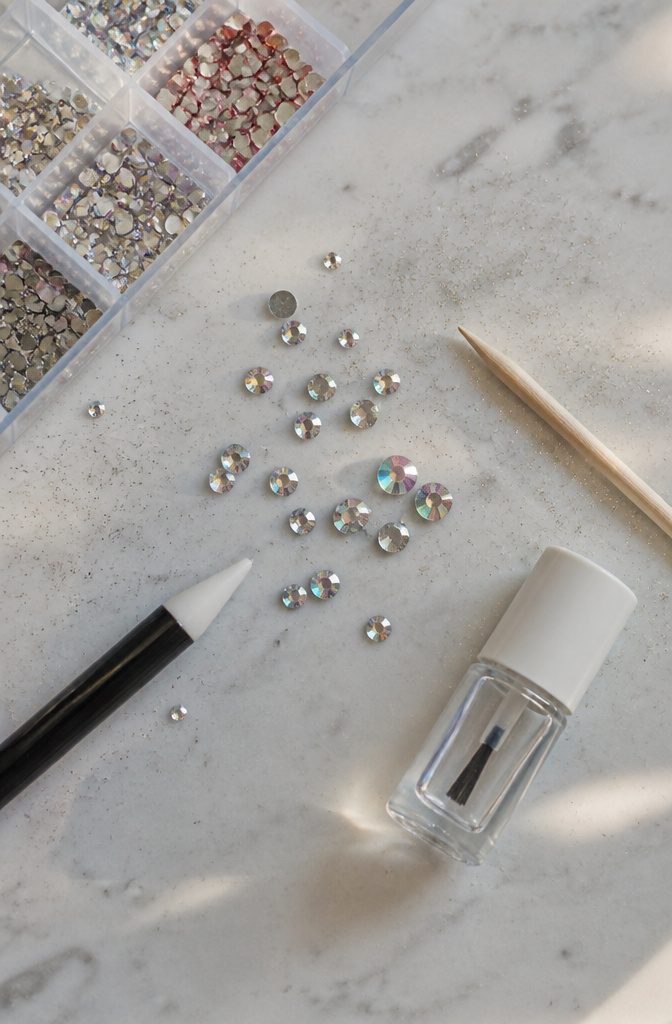
A wax pencil picks up rhinestones better than tweezers ever did for me. The wax tip grips the facet without leaving fingerprints, and the stone releases exactly where you press it.
Tweezers work in a pinch, but one slip and the gem launches across the room. A toothpick or orangewood stick can nudge the stone into place once it is down, which matters more than you would think at this scale.
Nail glue beats rhinestone adhesive hands down for nail health.
Rhinestone adhesive is built for fabric or paper, not the keratin plate, and the solvents can leave nails brittle underneath. Proper nail glue is formulated for the surface and removes more cleanly when the time comes.
The basic kit stays lean: wax pencil, nail glue, a few sizes of rhinestones, a toothpick for adjusting, and a good top coat to seal.
DIY rhinestone kits for beginners bundle all of this together so you are not sourcing pieces separately. The stones may be uniform in those sets, which is fine for learning placement before you branch into multi-shape dimension.
Nail Shapes and Colors
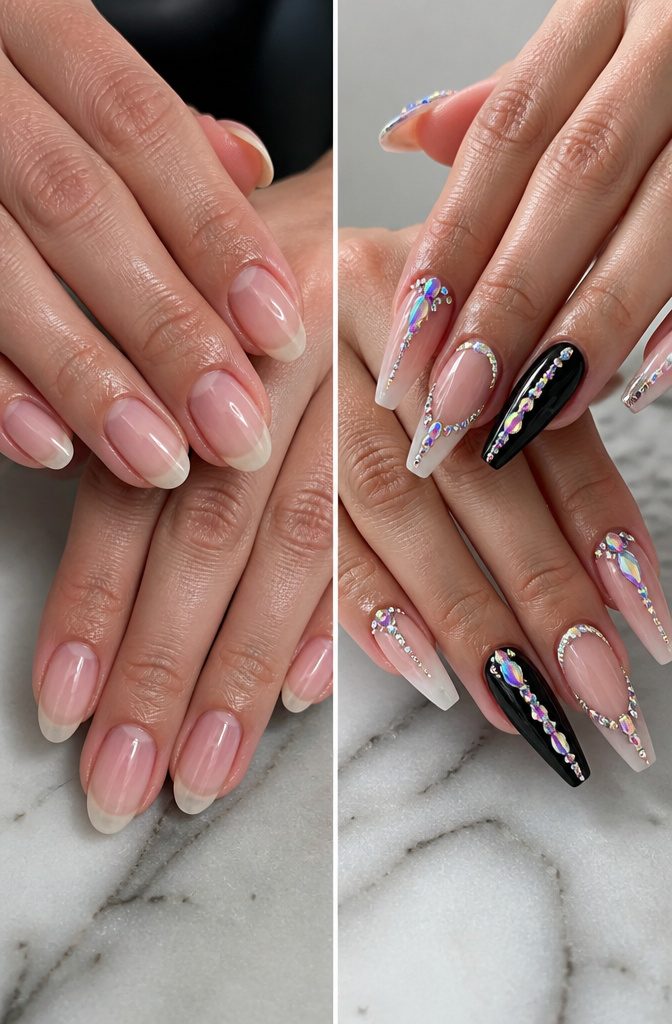
Almond and coffin nails give rhinestones the flat real estate they need without the tip drama of a stiletto.
Square works too, especially for a single line of stones marching across the free edge, but the sharper angles can snag on hair and fabric in ways a rounded almond rarely does.
I’ve seen a full constellation on a coffin nail hold steady for three weeks while the same weight on a stiletto needed repair by day ten, the point too narrow to balance the glue surface.
Nude polish does the heavy lifting for rhinestones because it erases the nail bed and lets each stone read as floating. Black turns the whole finger into evening jewelry; the stones catch light against darkness rather than competing with color.
Pastels soften the look for anyone who finds full glamour too loud, and a clear coat with scattered stones on bare nail reads as jewelry itself, nothing underneath to date the choice.
When to Wear Them
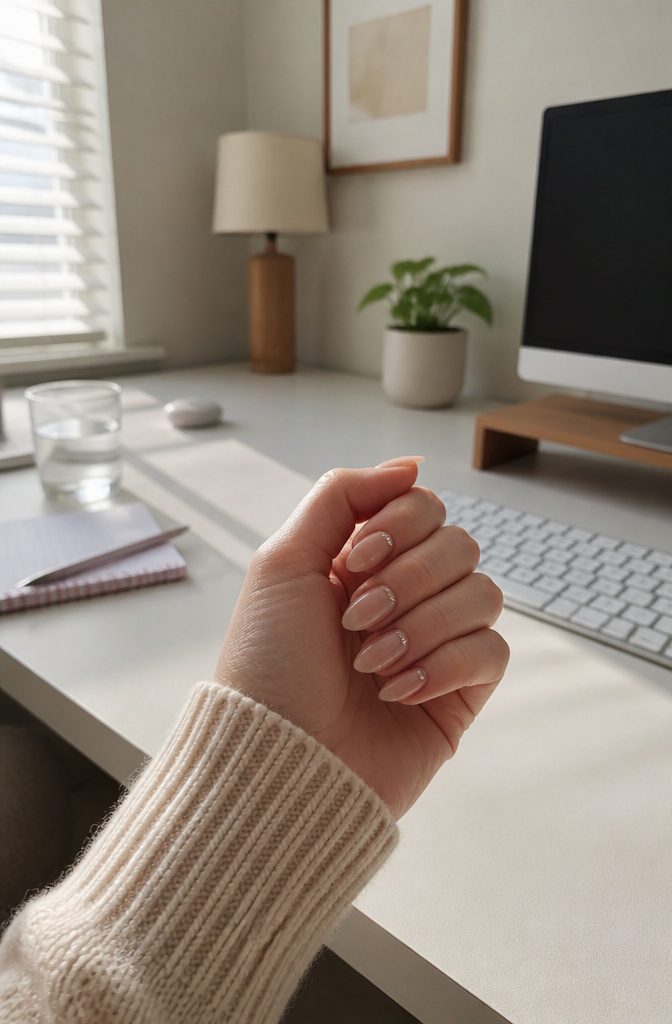
Daily wear is practical only when the stones stay small. One or two tiny gems on beige polish, or a single rhinestone at the cuticle, reads as neat rather than loud in most offices.
Short nails with a soft pink base and minimal sparkle pass for professional; heavy clusters do not.
The durability tradeoff is real. High-quality adhesive keeps simple accents intact for a week or more, but full bling coverage loosens faster under dishwater, keyboards, and the rest of a routine.
For weddings, proms, and holiday parties, the risk makes sense: the event lasts one evening, and acrylic bases can hold the heaviest layouts without buckling.
Almond shapes with scattered gems soften the look for elegant evenings; coffin shapes lined with stones deliver the edge for statement moments.
My own rule: the closer the look gets to fully blinged acrylics, the shorter the window I expect from them.
A single gem per nail survives daily life. All-over rainbow crystals are for when the photograph, not the Tuesday commute, is the point.
Frequently Asked Questions
What are the best ways to apply rhinestones to nails?
The easiest approach is a wax pencil or tweezers to lift each stone, then place it onto a dab of UV gel adhesive or nail glue.
A dotting tool or toothpick keeps the glue blob small and precise, and sealing with top coat over the whole nail adds a second layer of hold.
UV gel adhesive outlasts standard glue, though it needs a lamp or longer dry time.
Can you add rhinestones to natural nails?
Yes, rhinestones work on natural nails when the surface is prepped with a base coat first.
Clean the nail, apply base coat and color, let everything dry fully, then glue the stones on and seal with top coat. Proper nail glue is formulated for keratin and removes more cleanly than fabric-grade rhinestone adhesive.
Should you add a top coat over rhinestone nail art?
Yes, a top coat secures the stones, prevents scratching and dulling, and gives the nail a smoother finish.
Brush it over the entire nail including the stone edges so nothing catches or lifts early. This single step is what keeps a single gem intact through a week of normal wear.