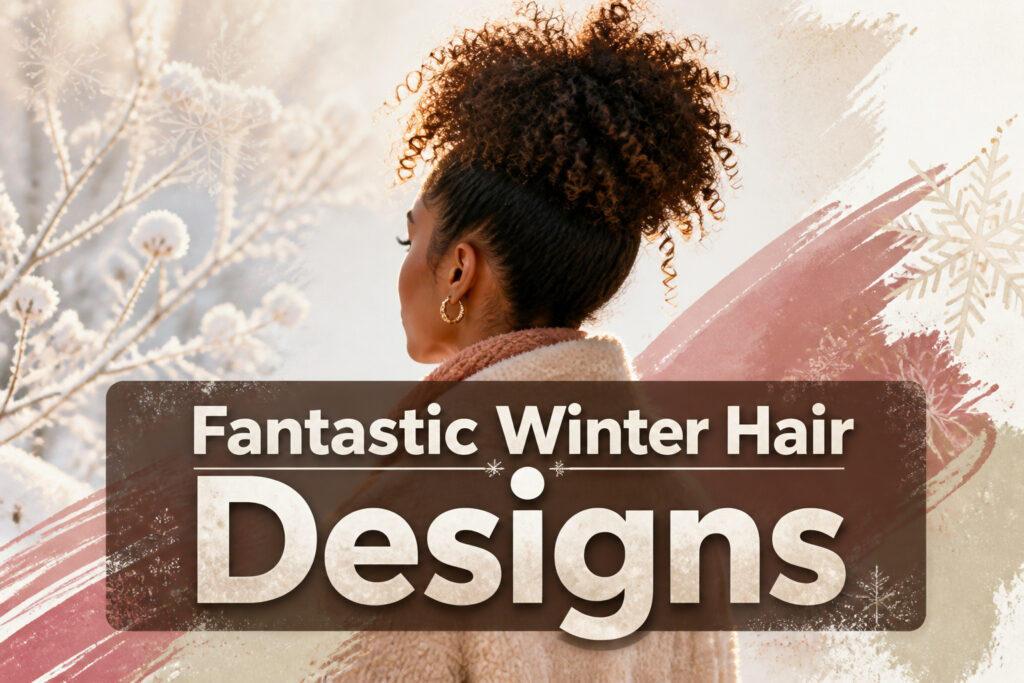
Winter styles range from five-minute puffs to hour-long braided crowns, and the difference that matters is how much manipulation your hair can take before the dry air wins. The high puff skips heat entirely with a silk scrunchie and leave-in conditioner, while diffused curls demand patience: 80% dry under the bowl, then hands-off until the room air finishes the job.
1. Bouncy Blow-Dry
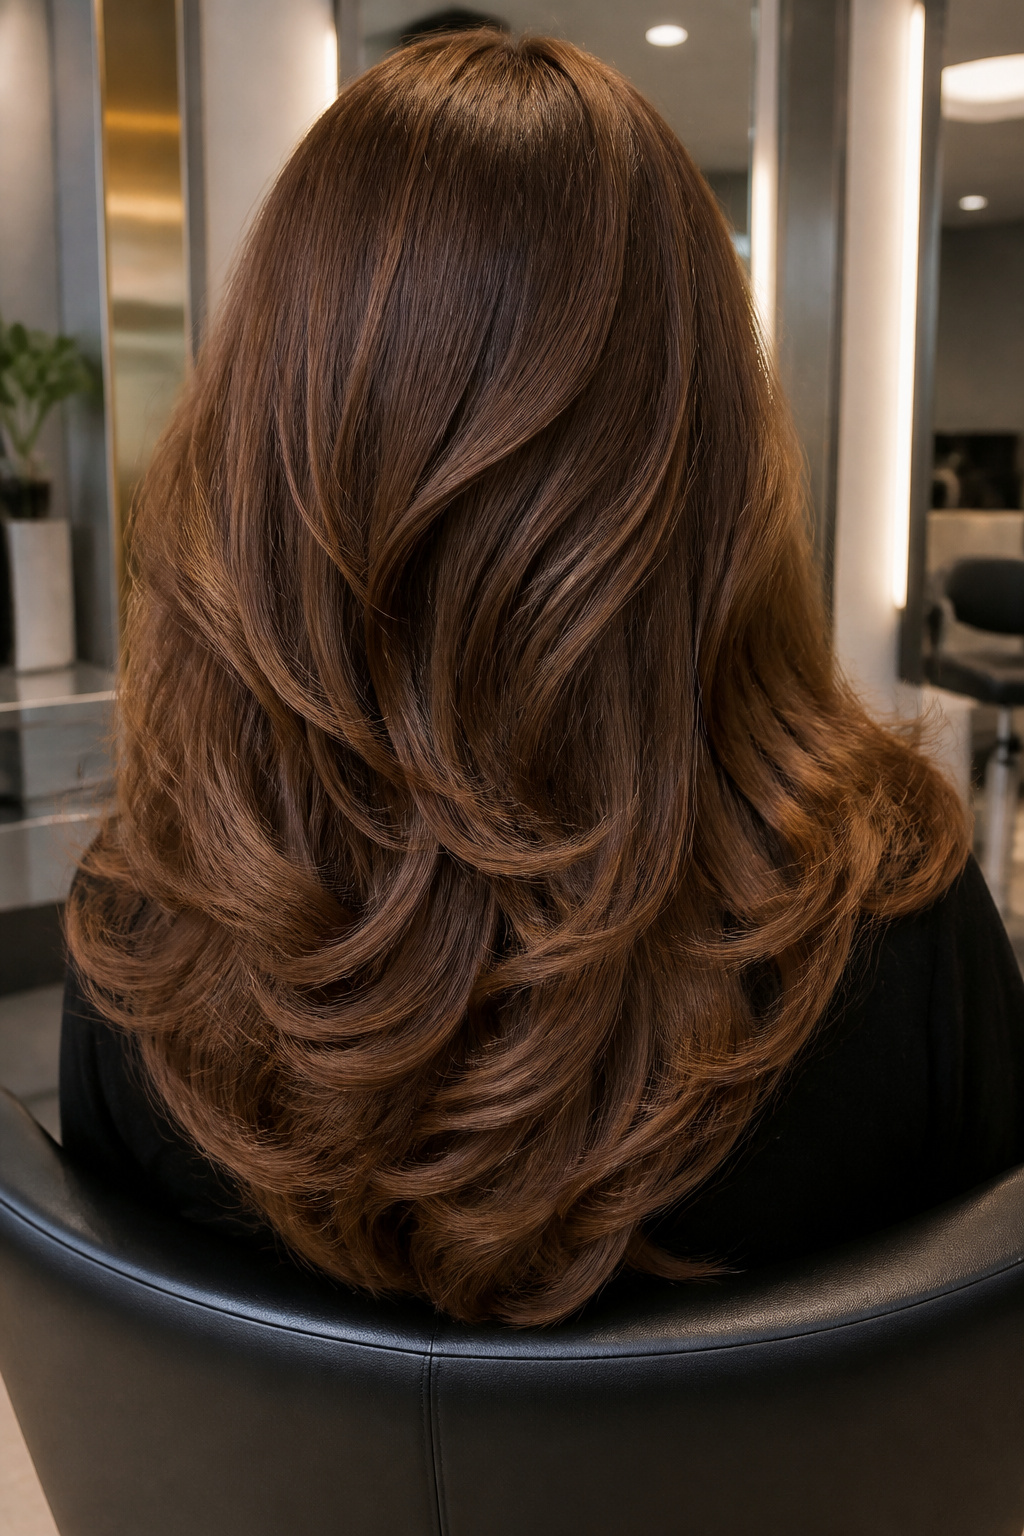
Flat winter air pulls the life out of hair faster than anything else. A bouncy blow-dry builds volume at the root and keeps the shape alive even after you pull off a beanie. The method is simple: work in medium to large sections with a round brush, rolling each one up to the roots and pulling down slowly while the dryer follows. Let each section cool pinned around your finger for about 20 minutes before you brush through. That cooling step is what locks the curl. For curly or coily textures, running a wide iron over the hair first smooths the surface and helps the round brush do its job without fighting texture. Skip the cool-down and the bounce collapses by noon.

FASTER DRYING, SALON BLOWOUT: Achieve a salon-quality hair blowout at home. This 2-in-1 blow dryer brush dries and styles simultaneously, for a much faster styling routine.

CERAMIC BARREL: This innovative round brush has a thermal ceramic 2 inch barrel that evenly distributes heat, which means faster drying time, when your hair dries faster, it’s exposed to less heat and stays healthier

FASTER DRYING, SALON BLOWOUT: Achieve a salon-quality hair blowout at home. This 2-in-1 blow dryer brush dries and styles simultaneously, for a much faster styling routine.
2. Winter Waves
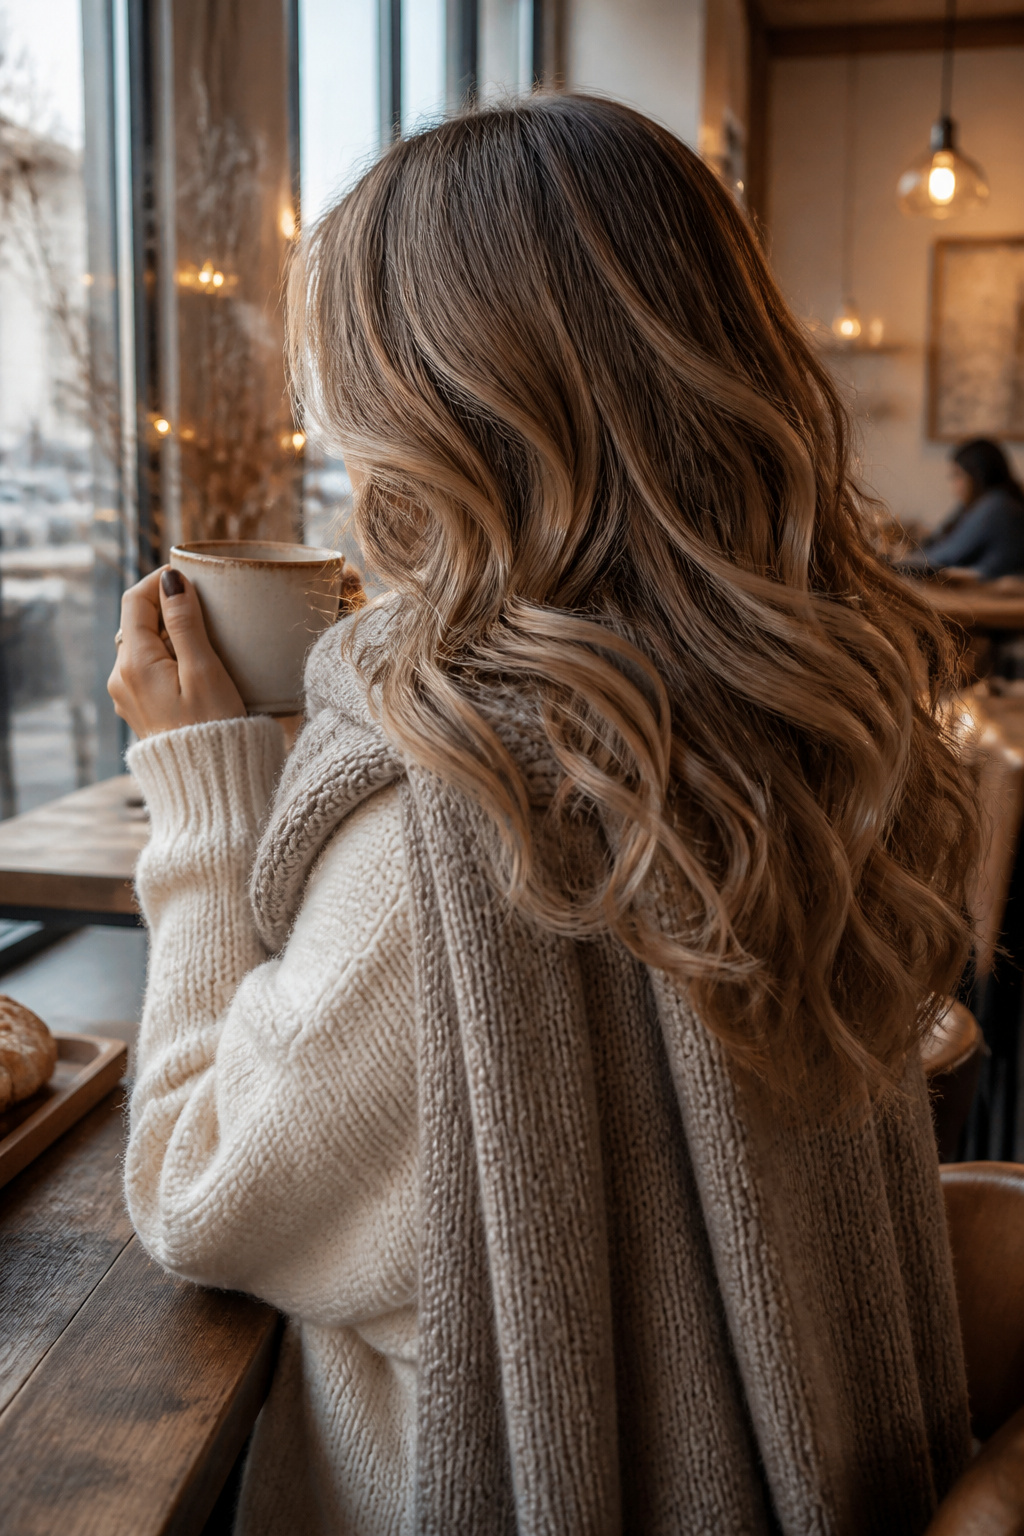
Soft ‘S’ curves from a flat iron hold their shape better in dry winter air than anything a curling wand produces. The metal plates press each bend flat rather than wrapping it, so the wave keeps its structure when static from wool scarves and coat collars tries to lift it apart.
Work with dry, brushed hair in small to medium sections. Clamp the iron at the root, push the hair into the first curve, slide down and reverse the direction for the next bend, leaving a gap between each wave so the shape stays loose. A wider 1.5-inch plate saves real time on thick or long hair. Once the head is done, a quick mist of heat protectant spray before you start and a light hairspray after give the hold without stiffness. Run your fingers through to break up the uniformity; the goal is movement, not pattern.
The looser silhouette also means the style recovers when you pull a hat off. Tighter curls collapse into frizz under that friction. These waves just settle back.

HEAT PROTECTION: Shields hair from high-heat styling tools up to 450°F while preventing heat damage and breakage for smoother, stronger strands with every blow-dry, curl, or flat-iron use.

Heat protectant: This weightless heat protectant spray shields your hair from heat damage up to 450°F while delivering lightweight conditioning; preps hair for smooth, strong, ready-to-style hair
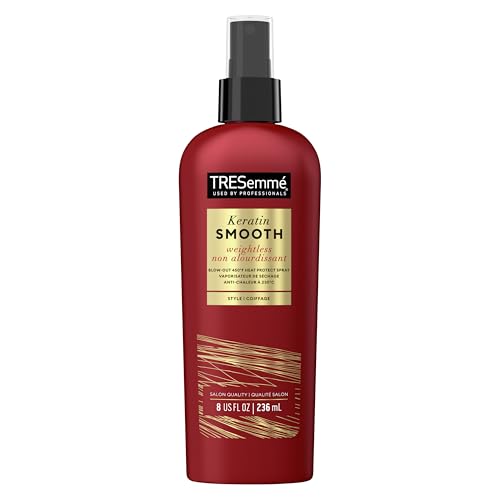
HEAT PROTECTANT SPRAY: TRESemmé Thermal Creations leave-in heat protectant spray for hair provides 5 smoothing benefits in 1, leaving hair shiny and enviably soft
3. Christmas Curls
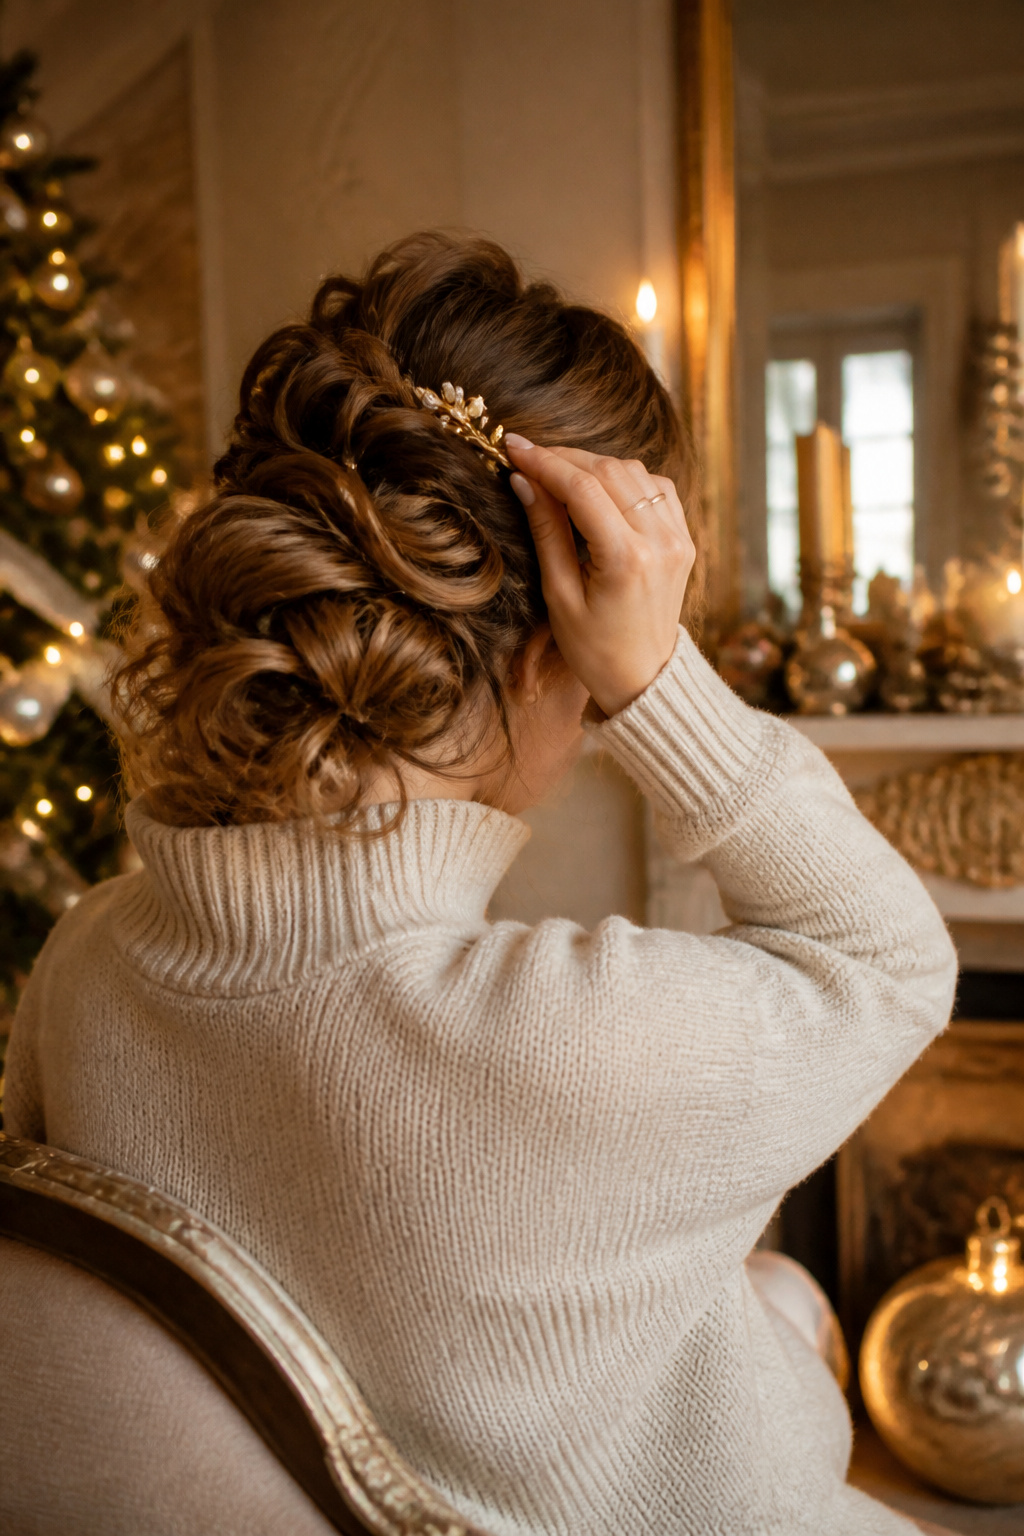
The curling wand wins over a spring iron for holiday hair because you control where the heat lands. A 1-inch barrel, wrapped in thin sections and twisted away from the face, builds curls tight enough to survive three hours of dry indoor heating that would pull a looser wave flat by dessert. Let the curls cool completely before you touch them; that set is what locks the shape past midnight. A light mist of flexible hold hairspray finishes without the helmet effect, so the bounce reads festive, not fought-for.

SMOOTH, STRAIGHT HAIR: Get sleek, frizz-free results with the Conair Double Ceramic 1-Inch Flat Iron featuring even heat for polished, healthy-looking styles.

30-SECOND HEAT-UP, FULL HEAD IN UNDER 20 MINUTES: Advanced PTC heating gets the plates ready in about 30 seconds, and the 2-inch width covers more hair in every pass — turning what used to be an hour of arm-aching work into a quick morning routine.

【32 Adjustable Temps for All Hair Types】 With 32 Heating levels from 140℉ to 450℉, TYMO SWAY professional hair straightener can give you optimal straightening or curling salon result for nearly all hair types, including curly, afro, fine, and thick hair.
4. Polished Ponytail
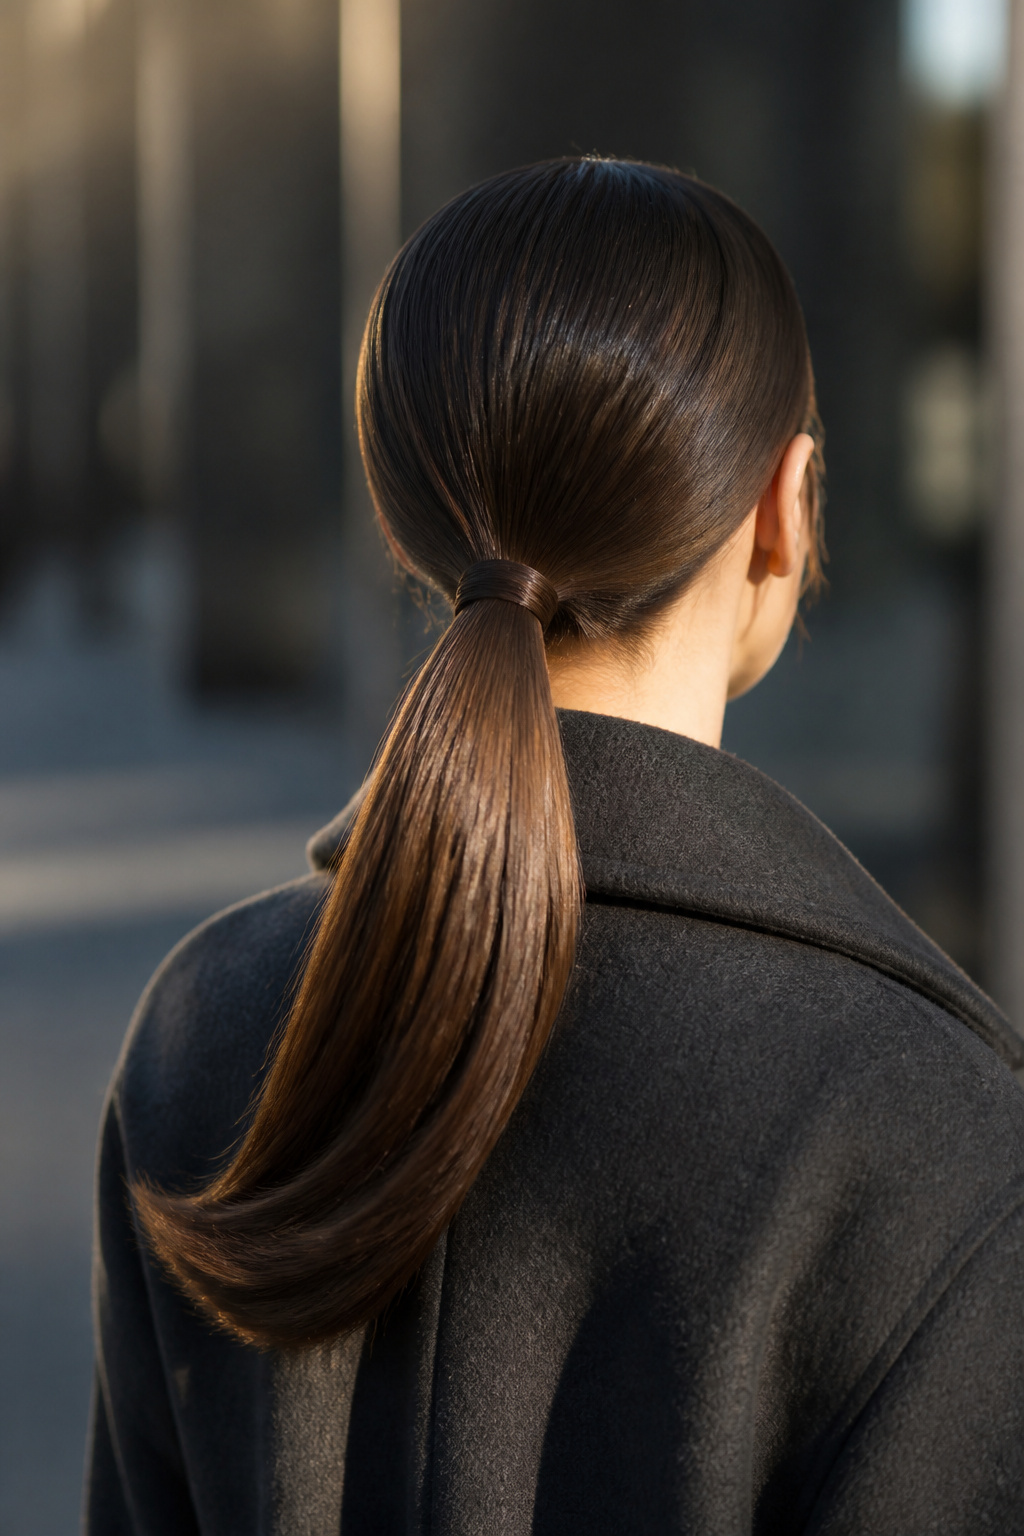
A polished ponytail demands more prep in winter than any other season, and the difference shows in the first five minutes outside. Dry, cold air outside and indoor heating both strip moisture from the shaft, so the surface catches light unevenly and every flyaway stands at attention. I start with clean, dry hair and work a heat protectant through from root to tip; the shield matters twice here, since the straightening iron passes are non-negotiable for that glassy finish. Two passes at moderate heat beat one scorching drag that fries the cuticle and invites static later. The pony itself sits high or low, but the band disappears under a wrapped section no thicker than a centimeter, pinned underneath so the line stays uninterrupted. A dab of lightweight serum on a toothbrush handles the halo without greasing the crown. Skip the hairspray unless the forecast calls for wind; in dry air it can stiffen into something that flakes by noon.

1 Inch Curling Wand: Designed to create loose, silky, classic curls and waves. Our 1-inch curling wand features a clamp-free design that allows you to wrap hair easily, creating a variety of soft, defined curls without kinks or creases. Delivers long-lasting results. Suitable for medium-length and long hair.

Ceramic Infusion Technology: Combines antioxidant-rich Argan Oil with protein-rich Keratin for even, consistent heat performance and a smooth, radiant shine.

EFFORTLESS BEACHY WAVES THAT LAST: This 1-inch clamp-free double ceramic curler wand features instant heat-up for smooth, frizz-free beachy waves on short to long hair and fine to thick textures, while ceramic heat helps reduce hot spots and heat damage.
5. Festive Fringe
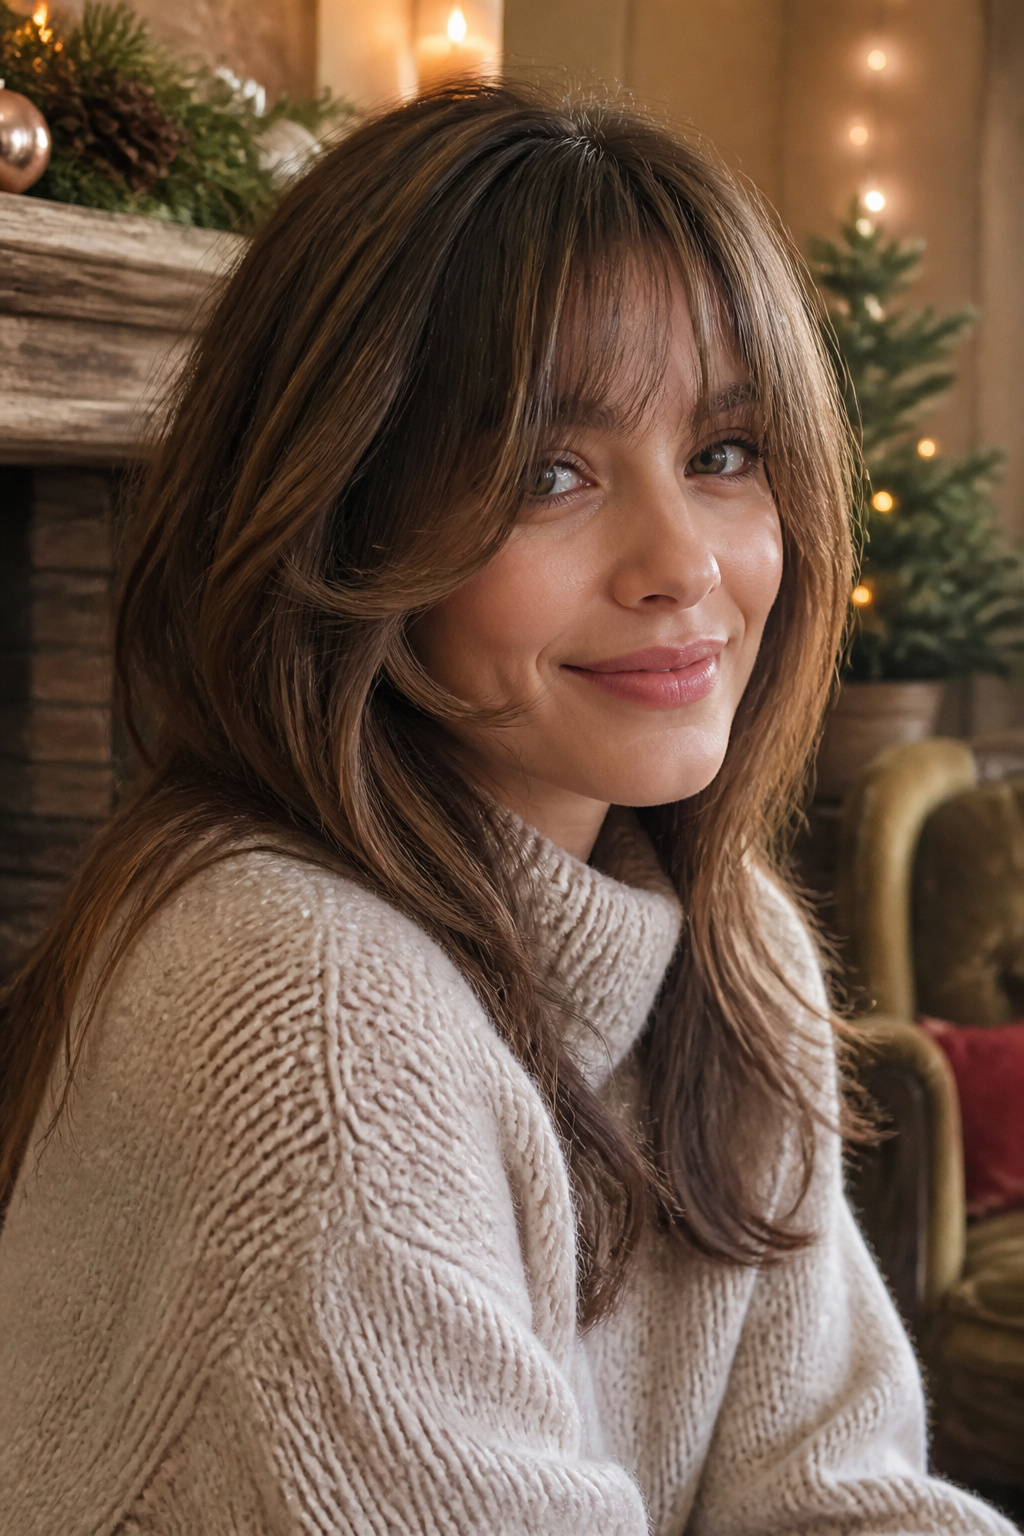
A fringe cut to curve around the face stays visible even when a beanie or hood hides everything else. Part hair down the middle and blow-dry the section away from the face with a round brush, feathering the ends for softness. The shape draws the eye straight to bone structure and eyes, which matters when the rest of the style is pulled back or flattened under wool.
This practical fringe "curves around the face like a halo, creating instant lift and movement, as well as contouring your cheekbones."
— Glamour
The halo shape sits between curtain and blunt bangs, so it can be swept either side on days when full forehead coverage feels like too much. Clip the fringe up for 10 to 15 minutes after styling to lock the bounce in before heading out.

GEY YOUR HAIR ON THE A-LIST: Our hairspray provides a flexible and customizable hold that keeps you looking amazing, no matter what happens in the next 24 hours.

MOVE WITH CONFIDENCE flexible hold that moves with your hair

PROFESSIONAL QUALITY: Our Keratin Smooth Blowout Finishing Hairspray sets your iconic blowout with lasting smoothness & frizz control.
6. Soft, Voluminous Waves
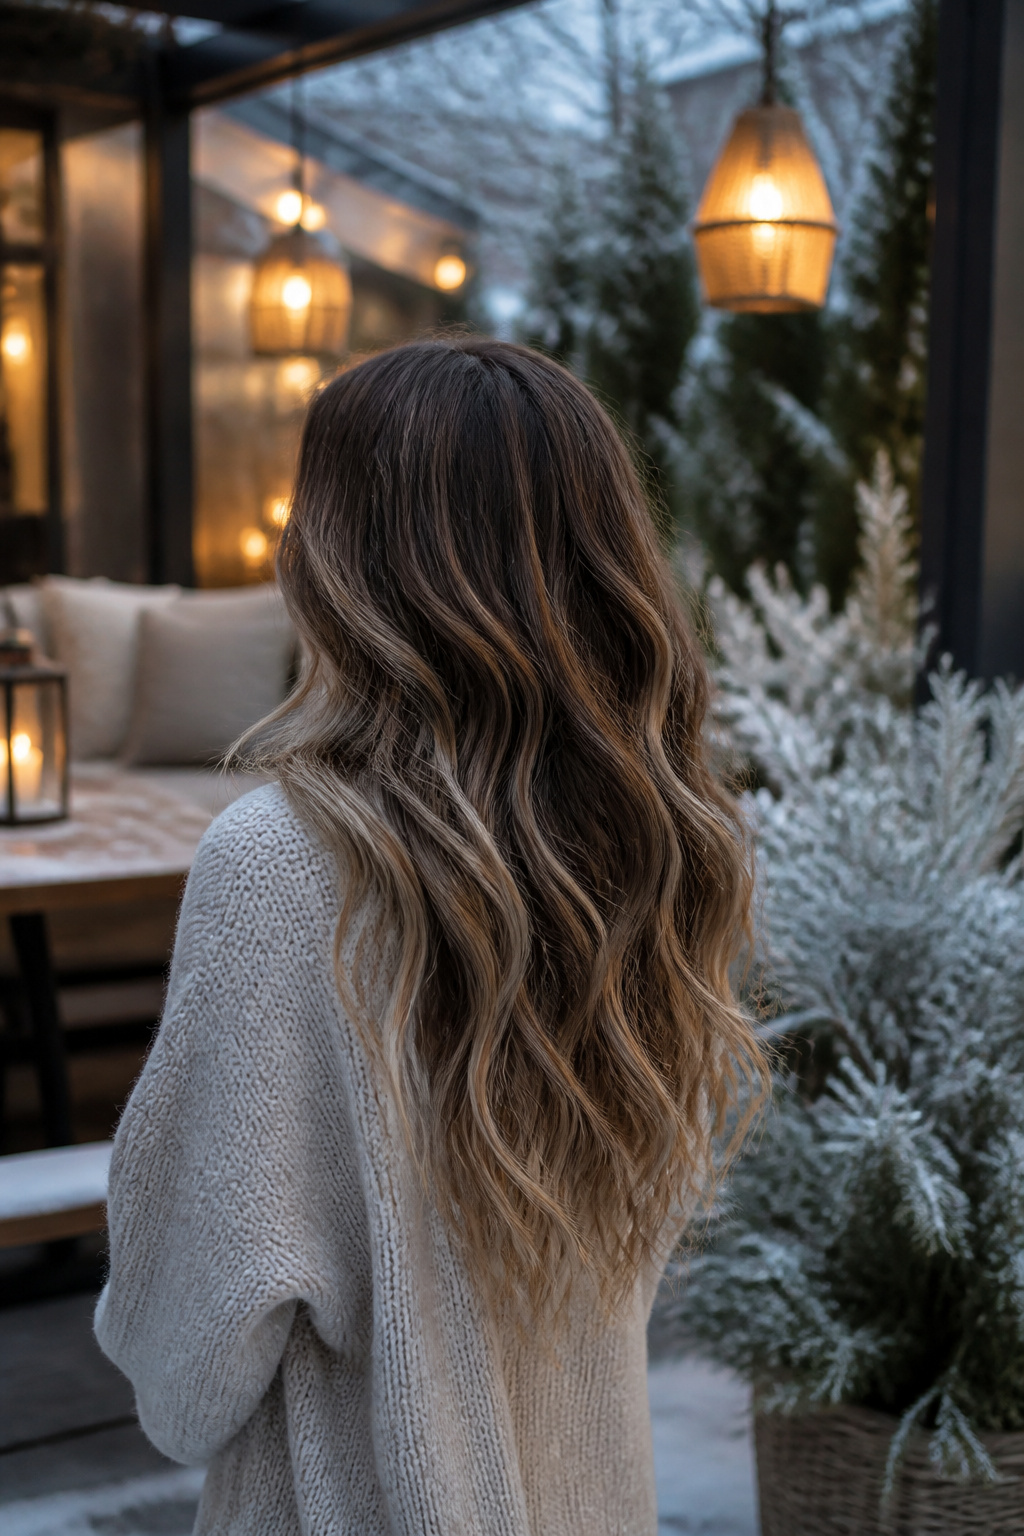
Soft waves on mid-length hair give enough texture and volume to read from under a heavy coat collar, which is exactly what winter demands. The grip from a texturizing spray replaces what dry, raw air strips away, so the body does not collapse by noon. A curling wand does the shaping: work in small sections, hold each wrap for a few seconds, then release. The sources split on finish. One route is finger-tousling for a relaxed, windswept effect; another is scrunching for something messier and more lived-in. Either way, the spray goes on last, not as an afterthought but as the step that keeps the wave from going flat against wool scarves and static. Sea salt spray gets mentioned for texture too, though it reads more California beach than January commute. For cold-weather staying power, texturizing spray wins.

SNAG-FREE: This round hair brush features ball-tipped nylon bristles that help to blow-dry style hair without snagging or pulling.
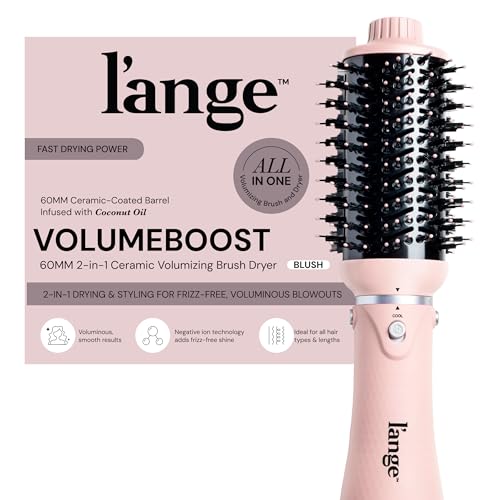
BOUNCY, VOLUMINOUS BLOWOUTS - Two heat settings and a cool shot switch give you salon-worthy results, while the snag-resistant bristles offer an effortless glide for a bouncy finish.

FASTER DRYING, SALON BLOWOUT: Achieve a salon-quality hair blowout at home. This 2-in-1 blow dryer brush dries and styles simultaneously, for a much faster styling routine.
7. Polished Low Bun
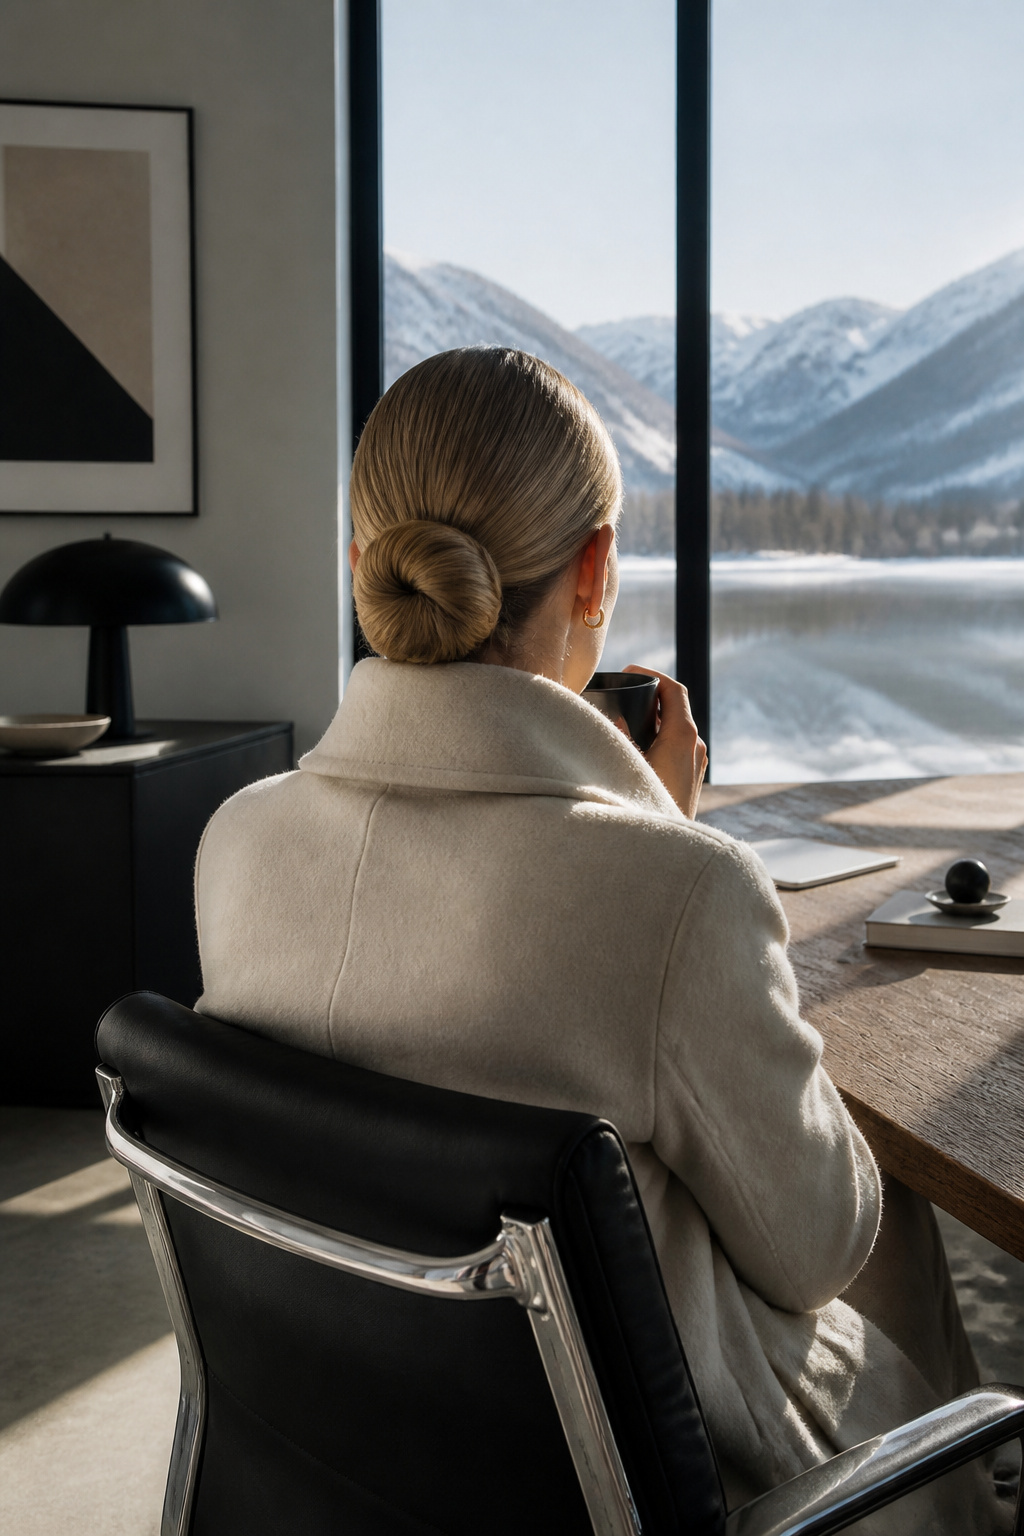
A sleek bun at the nape reads as deliberate when every flyaway is smoothed down. I learned this the hard way after a morning of static and hat hair left me looking like I had given up by 9 AM. The fix is product applied while the hair is still slightly damp, then a fine-tooth comb drawn through in one direction until the surface looks almost wet. Pin the twist itself, not just the ends, so the weight sits low and the bun does not migrate up your neck by noon.
The placement matters more than you might think. A bun that rests right at the hairline, where skull meets spine, stays comfortable under a beanie or hood without creating a pressure point. Higher and the hat pushes; lower and the elastic shows. The polished surface catches light even under office fluorescents, which is the difference between this and the loose, pulled-together version that reads as weekend hair. I keep a small brush in my bag for the first hour, since the sleekness tends to settle and need one pass to restore the intention.

Heat Protectant Leave In: This ultra lightweight leave in protects against heat damage up to 450F degrees while reducing frizz, hydrating long hair and sealing in shine for 3 day sleek hair

PROTECT YOUR HAIR FROM HEAT DAMAGE - Hairitage Play It Cool Heat Protectant for Hair provides up to 450 degree protection against the damaging effects of heat styling tools. Keep your hair healthy and strong while still achieving your desired style

HEAT PROTECTION: 6-fluid ounces of OGX Protecting + Silk Blowout Quick Drying Thermal Spray delivers quick-dry heat protection up to 450°F while smoothing, softening, and adding shine for big, beautiful blowouts
8. Textured Half-Up, Half-Down
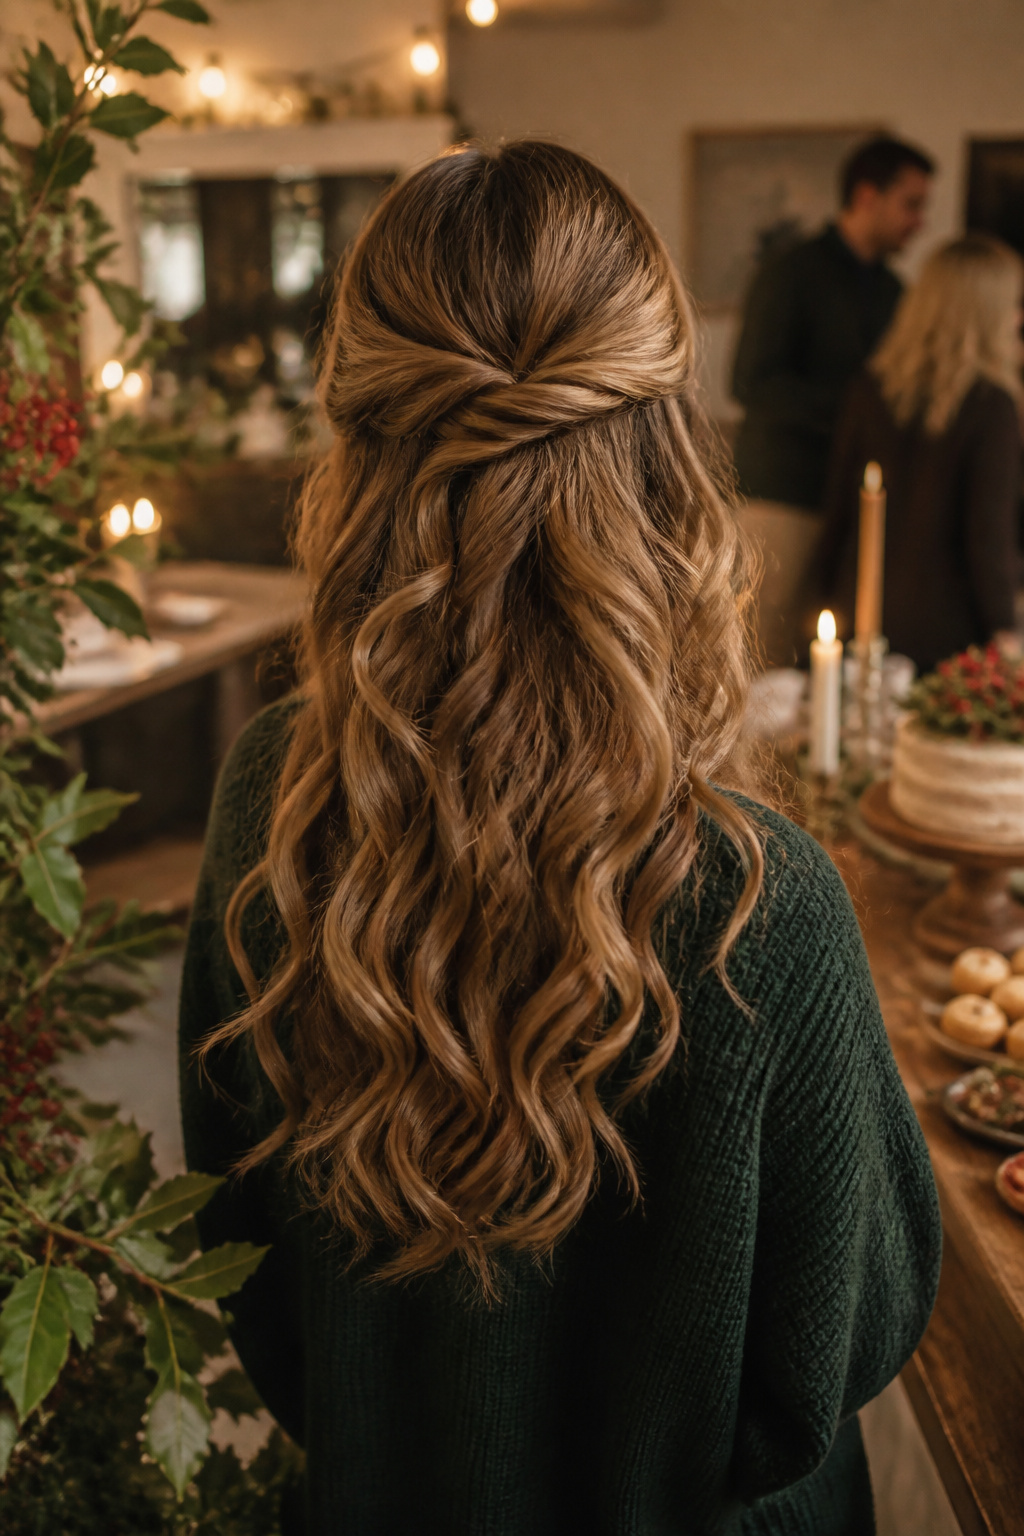
The half-up, half-down style earns its place in winter because it fixes two problems scarves create: hair pressed flat at the crown and a tangled, static-charged mass at the ends. Pulling the top section back and pinning it restores volume where the hat or scarf band sat, while the bottom half stays free and weighted enough to resist knotting.
Texture matters more here than in summer versions. Clean hair slips out of pins and deflates by noon, but a light tease at the crown or a few waves through the lower half gives the pins something to grip. The sources split on method: tease the crown for height, or add waves through the bottom section with a wide iron first. Both work. The wave approach takes longer but holds shape through a day that moves between overheated offices and freezing sidewalks.
For securing the top, a simple elastic works, though flipping the ponytail through itself once creates a tighter base that sits flatter against the head. Loosen the tension slightly around your face so the pull does not read as office-formal. Festive clips or pins dress it up for evening; leave them off and the same structure carries a Tuesday meeting.
The style fails when the top half is pulled too tight or gathered too low. Too tight reads severe; too low drags the face down. Aim the gathering at or just above the crown, where the head curves most.

ROSE GOLD CERAMIC FLAT IRON: Get sleek, glossy results with 30 settings, extra-long plates (compared to typical straightener plate length), and advanced ceramic tech that heats evenly up to 455°F for any hair type.

𝐒𝐀𝐋𝐎𝐍-𝐋𝐈𝐊𝐄 𝐄𝐗𝐏𝐄𝐑𝐈𝐄𝐍𝐂𝐄: Dorisilk salon-gradeFlat Iron, boasting meticulous temperature control and rapid temperature recovery, fast reaches an impressive 500ºF (260°C) for constant and stable styling. It efficiently straightens all hair types, from short curls to long locks, in a single pass, even thick, coarse hair.

More than a 2-in-1 hair styler: this professional salon 1.25 inch multi-use flat iron curler combo heats up quickly and can do it all - straighten, wave & curl - create these four iconic styles at home or on-the-go: sleek straight, loose beach S-waves, tight waves, and polished curls
9. Sleek, Straight and Shiny
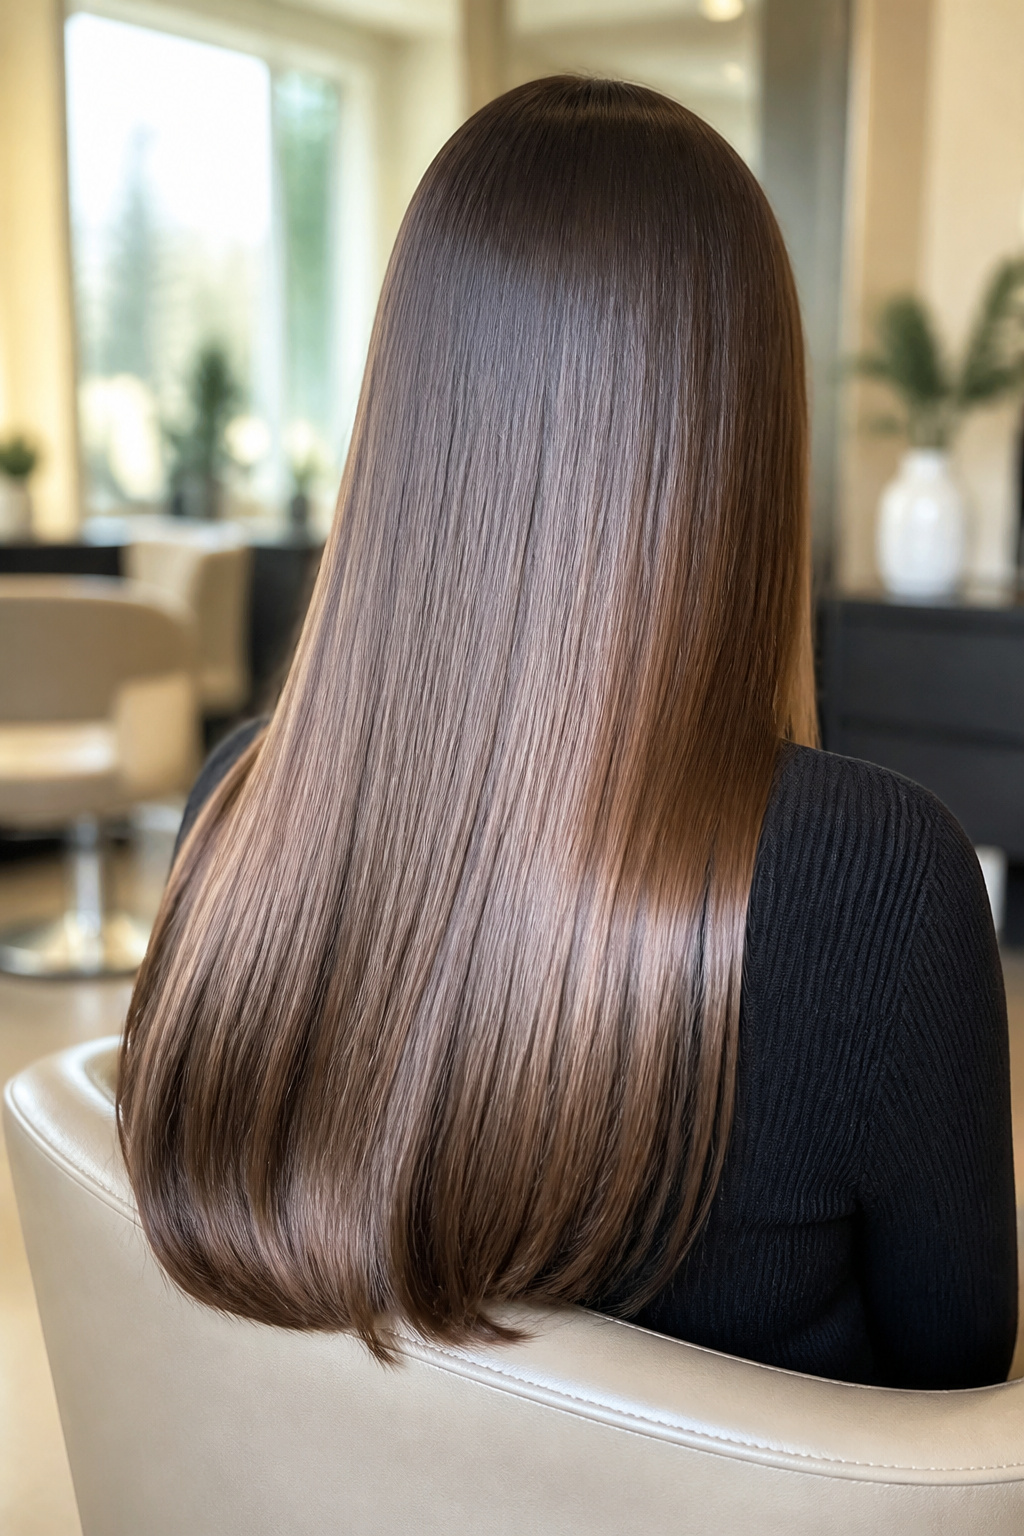
Flat-ironed hair with a reflective finish is one of the fantastic hair designs for winter that demands more from your product layer than summer ever did. The dry air outside and heated rooms inside pull moisture from the shaft faster than humid months, so the glass-like effect lasts only if you seal it deliberately.
A heat protectant applied to damp hair is the first non-negotiable step. Color Wow formulas include this protection across their range, and Redken’s Thermal Spray 22 guards up to 450°F (232°C). Blow-dry straight first if your texture is curly or coily, then work in sections with a flat iron that has wider plates. Cloud Nine’s Wide Iron runs 1.5 inches across and uses a Revive Mode to reduce direct heat contact, which matters when you’re already fighting winter brittleness.
The finish comes last and matters most in this season. A small amount of oil or serum, pressed through the lengths with your palms rather than combed, catches light without turning greasy by midday. Skip this step and the static wins by noon.

CERAMIC INFUSION TECHNOLOGY: The infused barrel, sized ½" to 1", combines antioxidant-rich Argan Oil and protein-rich Keratin for even heat distribution, ensuring a smooth, radiant shine with every use.
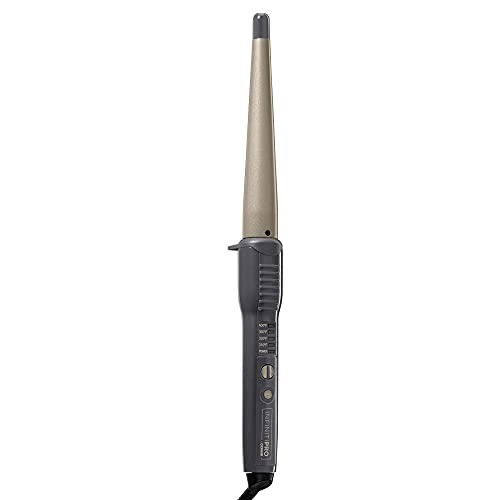
Ceramic Curling Wand: Instantly create defined to free flowing curls and beachy waves by wrapping your hair around this clamp free curling wand featuring a tapered barrel to make a variety of twisted spirals with no kinks or creases

TWIRL JUNKIE: Shine master plated technology for fast heat with massive shine. Tight curls and Waves
10. Messy Top Knot
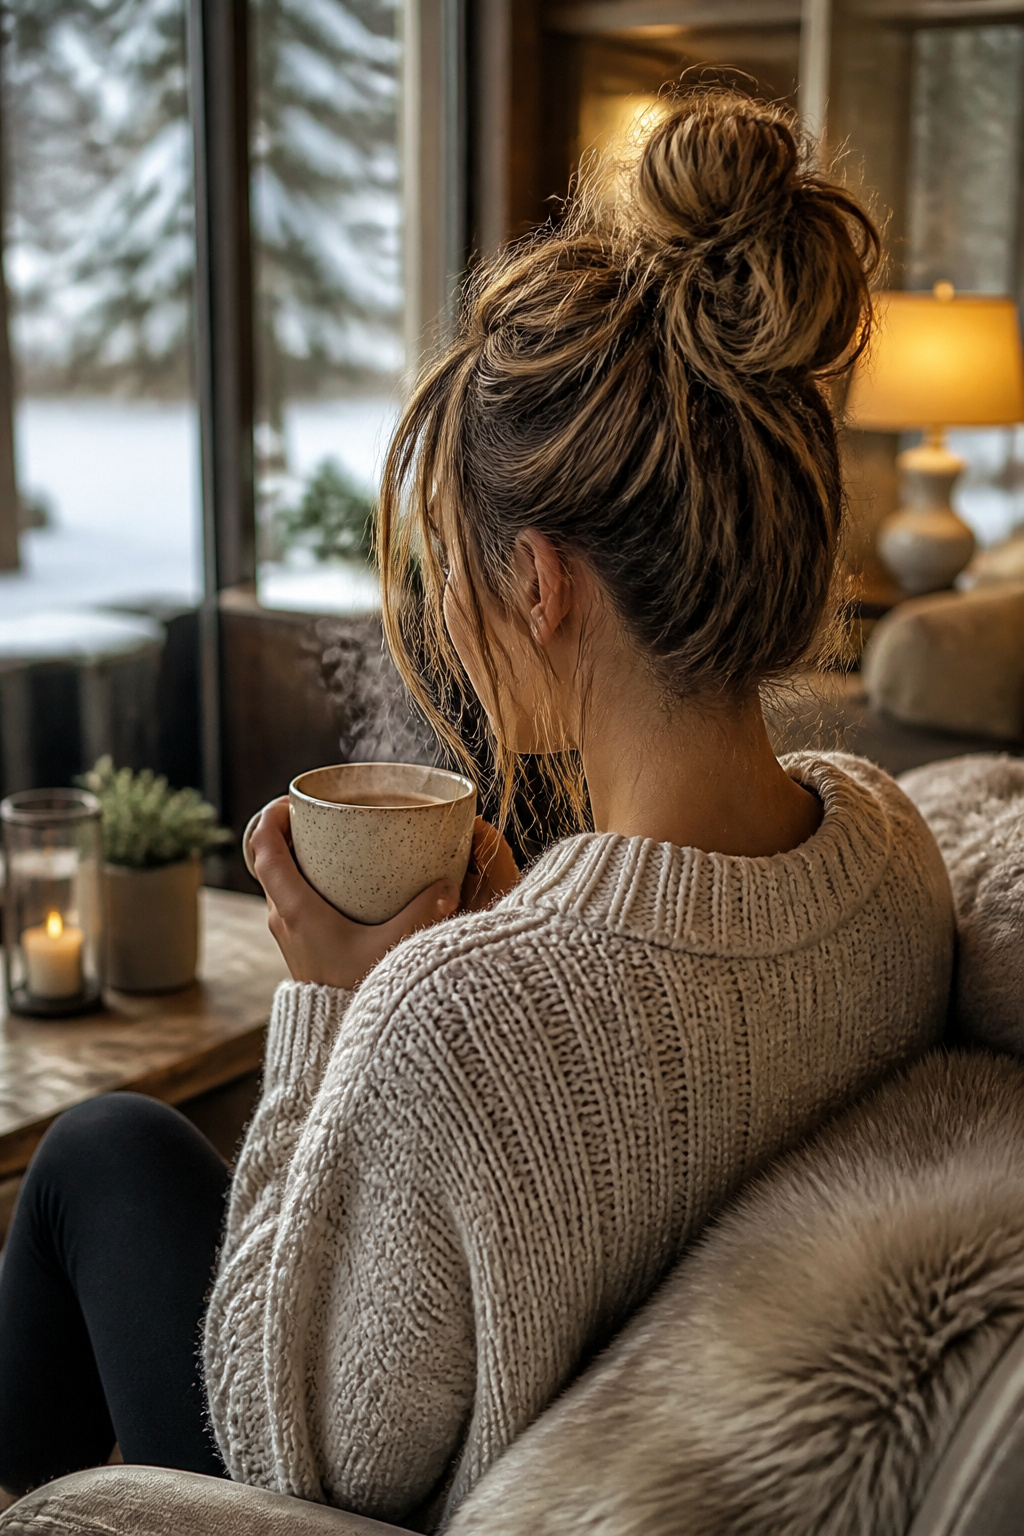
A messy top knot works in winter because the style is already doing what the weather forces on you. Static and hat hair will undo a polished bun in ten minutes outside; this version starts at undone and stays there.
Two approaches sit in the sources. One builds from a single high ponytail, twisted loose and pinned with a few face-framing pieces pulled free. The other splits the hair down the middle first, makes two high ponytails, loops each into a mini bun, then crosses and pins them together for more volume and structure. The first is faster. The second gives more texture to hold dry shampoo if you need grip on second-day hair.
Either way, a texturizing spray or dry shampoo underneath keeps the knot from slipping. A chunky scarf and sweater finish the look, which is the part most sources agree on.

Light Hold Hairspray: Aveda Air Control is a light hold hair spray that offers flexible, lasting hold for all hair types.
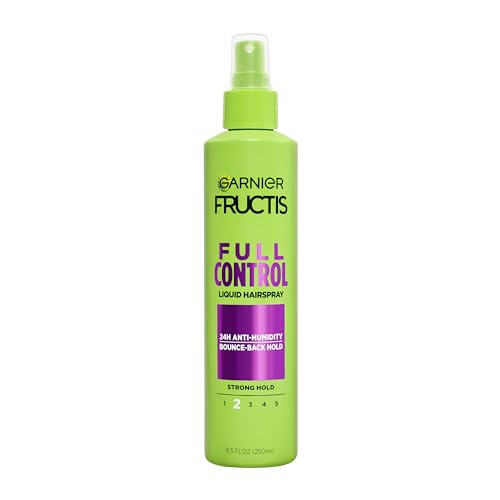
24-Hour Anti-Humidity Hairspray: Garnier Fructis Full Control Non Aerosol Hairspray with extra strong flexible hold delivers firm, bounce-back hold that keeps styles locked in and touchable all day, even in extreme humidity, without stiffness or crunch

Light, natural-hold hairspray creates brushable styles
11. Classic Braided Crown
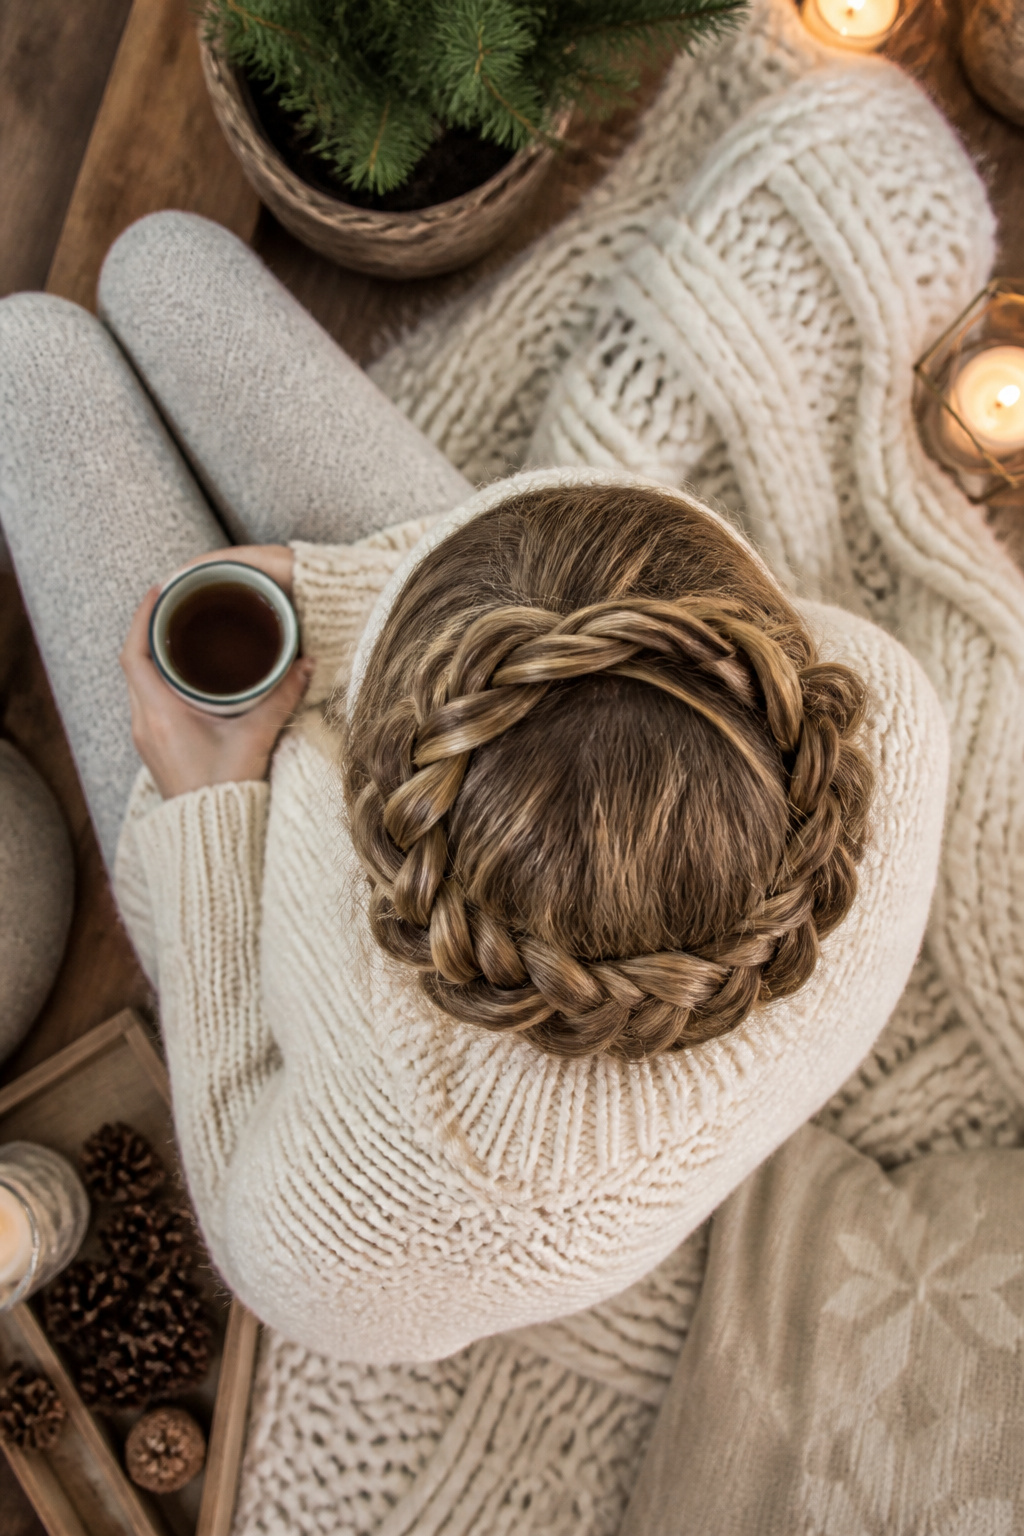
Two braids wrapped around the head and pinned create the clean halo shape that lifts hair off the neck where scarf friction causes breakage. The structure holds for full days once it is set, which matters on mornings when you pull on a wool loop and the collar of a coat right after.
Part down the middle, braid each side into Dutch braids or French plaits, wrap them around the top of the head, and secure with bobby pins. Tuck the ends in rather than letting them stick out, and finish with hairspray to keep the pins from working loose by afternoon. The tucked ends are what separate polished from half-finished; loose pieces catch on knit fibers and undo the protection you braided for.
This style works for casual days and for gatherings where you still need your hair to stay put through drinks and leaning across tables. The braids keep strands tucked away from dry winter wind, and the crown placement means no elastic band sits at the nape to rub against a coat collar.
12. Loose, Low Bun
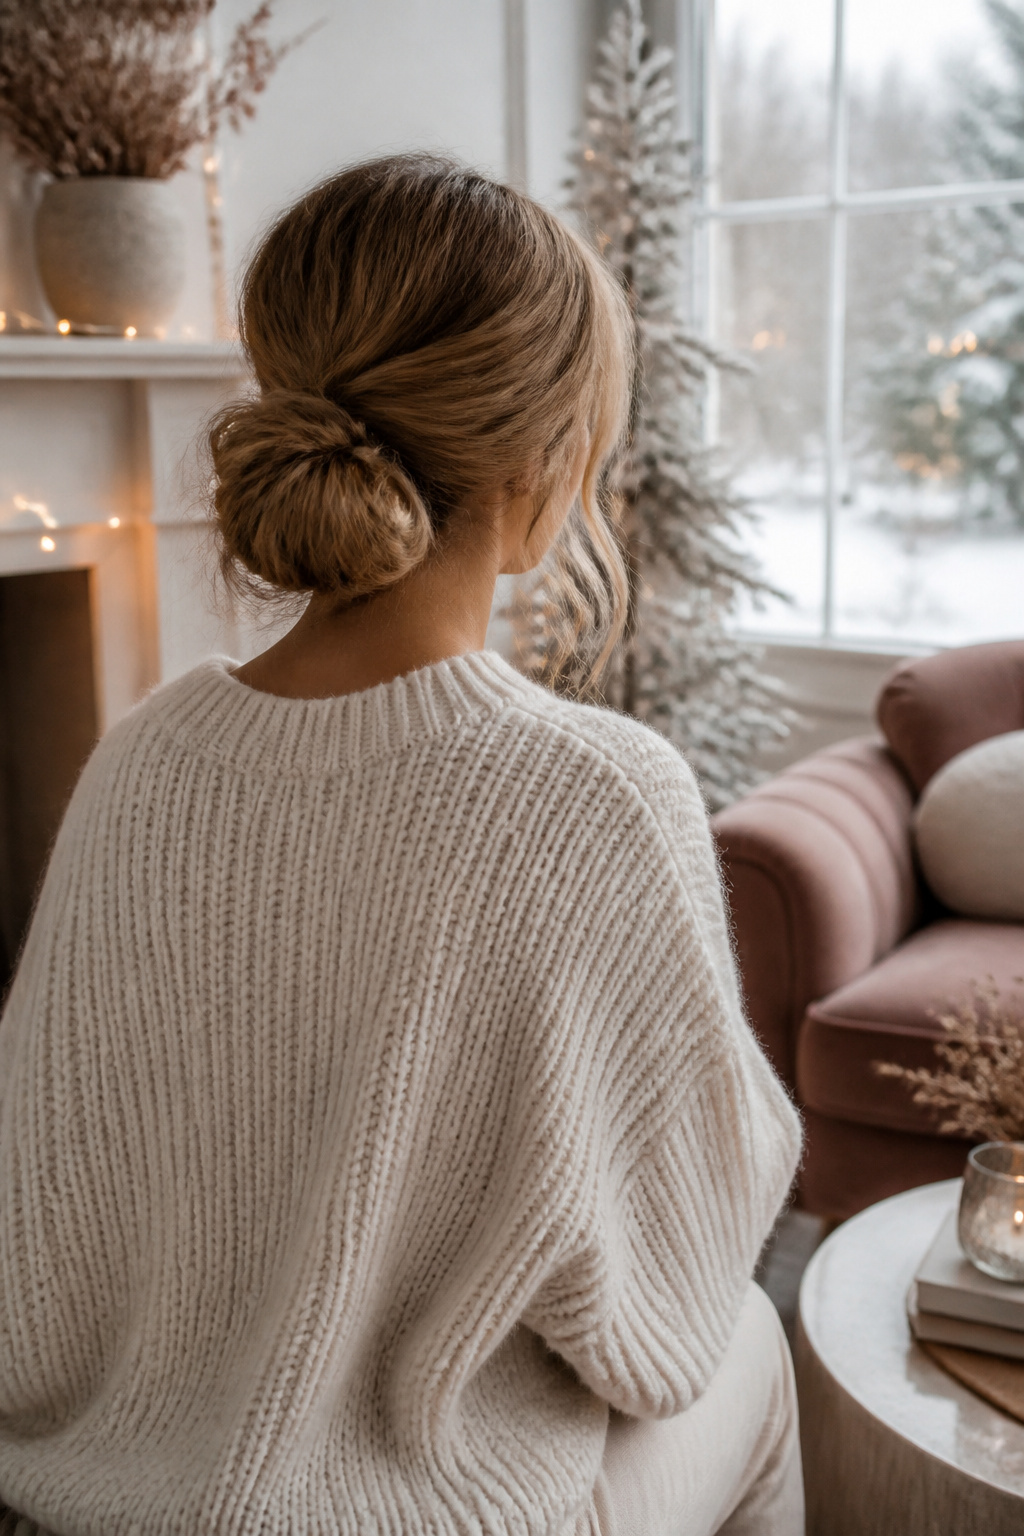
A loose, low bun carries enough polish for a dinner out while leaving wispy pieces around the face to soften the whole shape. The relaxed tension matters more than it looks: winter hair snaps easily where an elastic bites in, and this style keeps that pressure light. I started using silk scrunchies for exactly that reason after noticing more breakage at my nape every January. The texture helps too. A few loose curls twisted in before gathering give the bun something to grip, so fewer pins do the work and nothing pulls. Some days I smooth flyaways with a tiny dab of finishing balm, though on rushed mornings I skip it and the look still holds. A single clip or small accessory at the base dresses it up without adding weight where the hair is already gathered. The real win is that the looseness reads as intentional, not like you gave up halfway through; the difference is in the placement, low at the nape rather than drifting toward the crown, and in leaving those face-framing strands free on purpose.
13. Knotted Scarf Updo
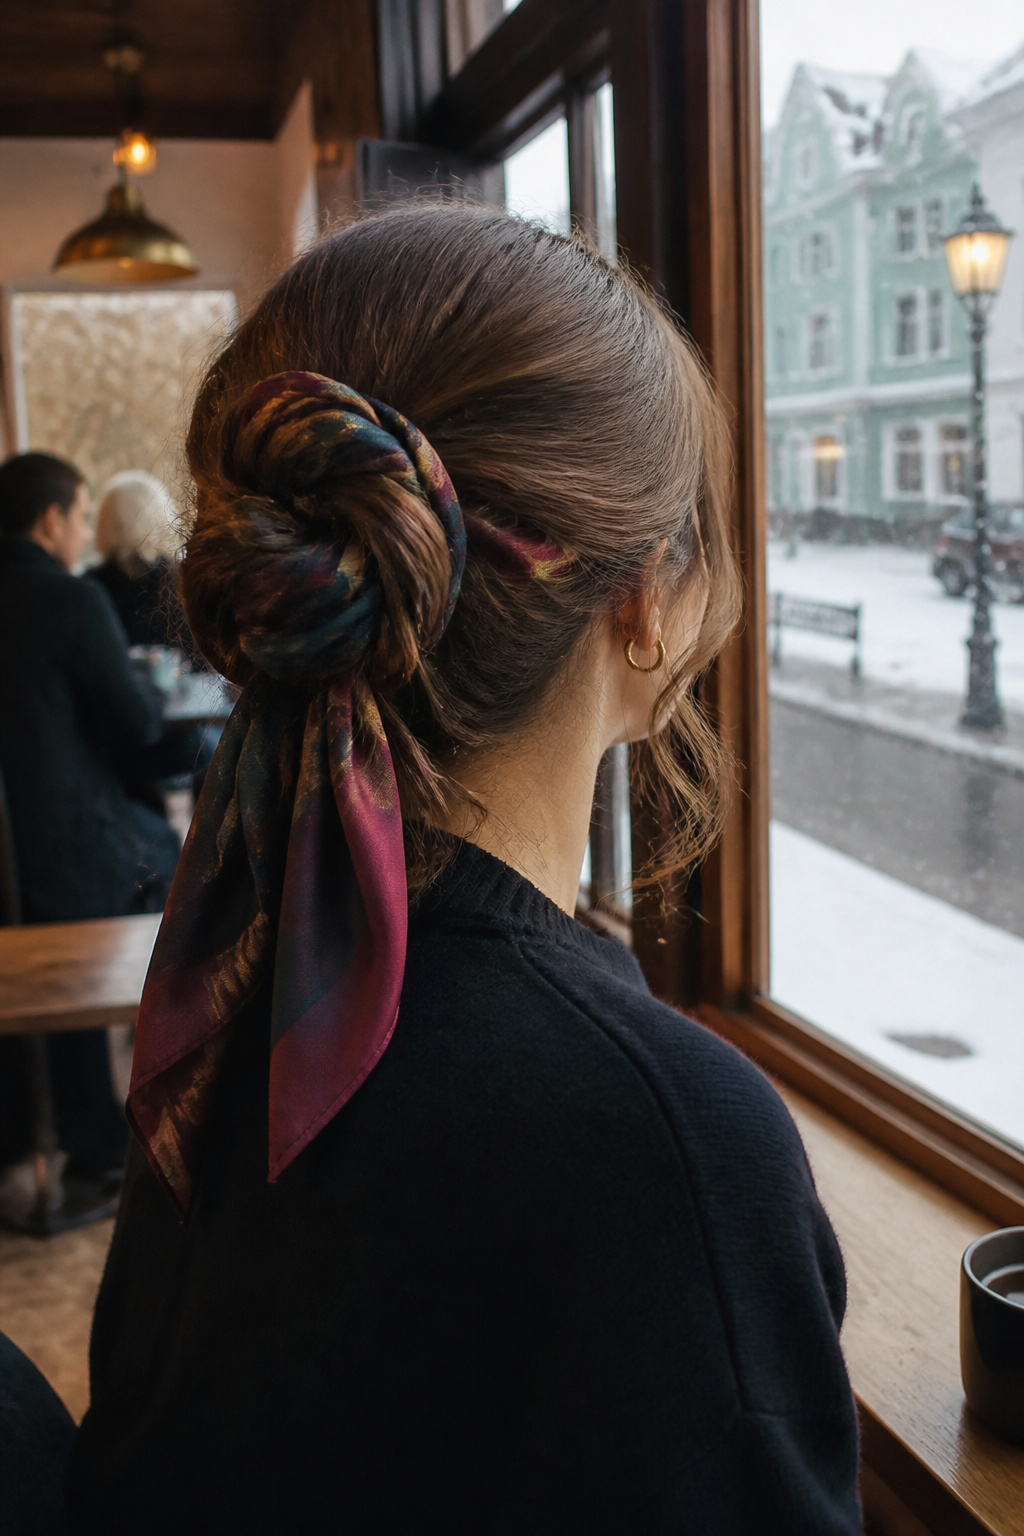
A silk or satin scarf tied directly into the hair solves the winter problem most updos ignore: what happens when you pull a hat off and the shape collapses. The scarf becomes structural, knotted around a loose bun at the nape and pinned so the fabric carries tension the hair alone cannot. The knot itself holds the shape, which means the style survives coat collars, wind, and the awkward indoor moment when you would rather not bare a flattened crown.
Satin or silk matters more than pattern here. Wool or cotton friction lifts the cuticle in dry winter air, and by February that shows as breakage at the bun line. The tighter weave of silk slides against itself, so the knot stays put without the hair underneath fighting back. Tuck the ends rather than letting them trail; loose tails catch on zippers and read as afterthought. Two or three strands loosened at the hairline soften the severity, but the scarf should do the framing work, not the face.
14. High Ponytail with Wrapped Bun
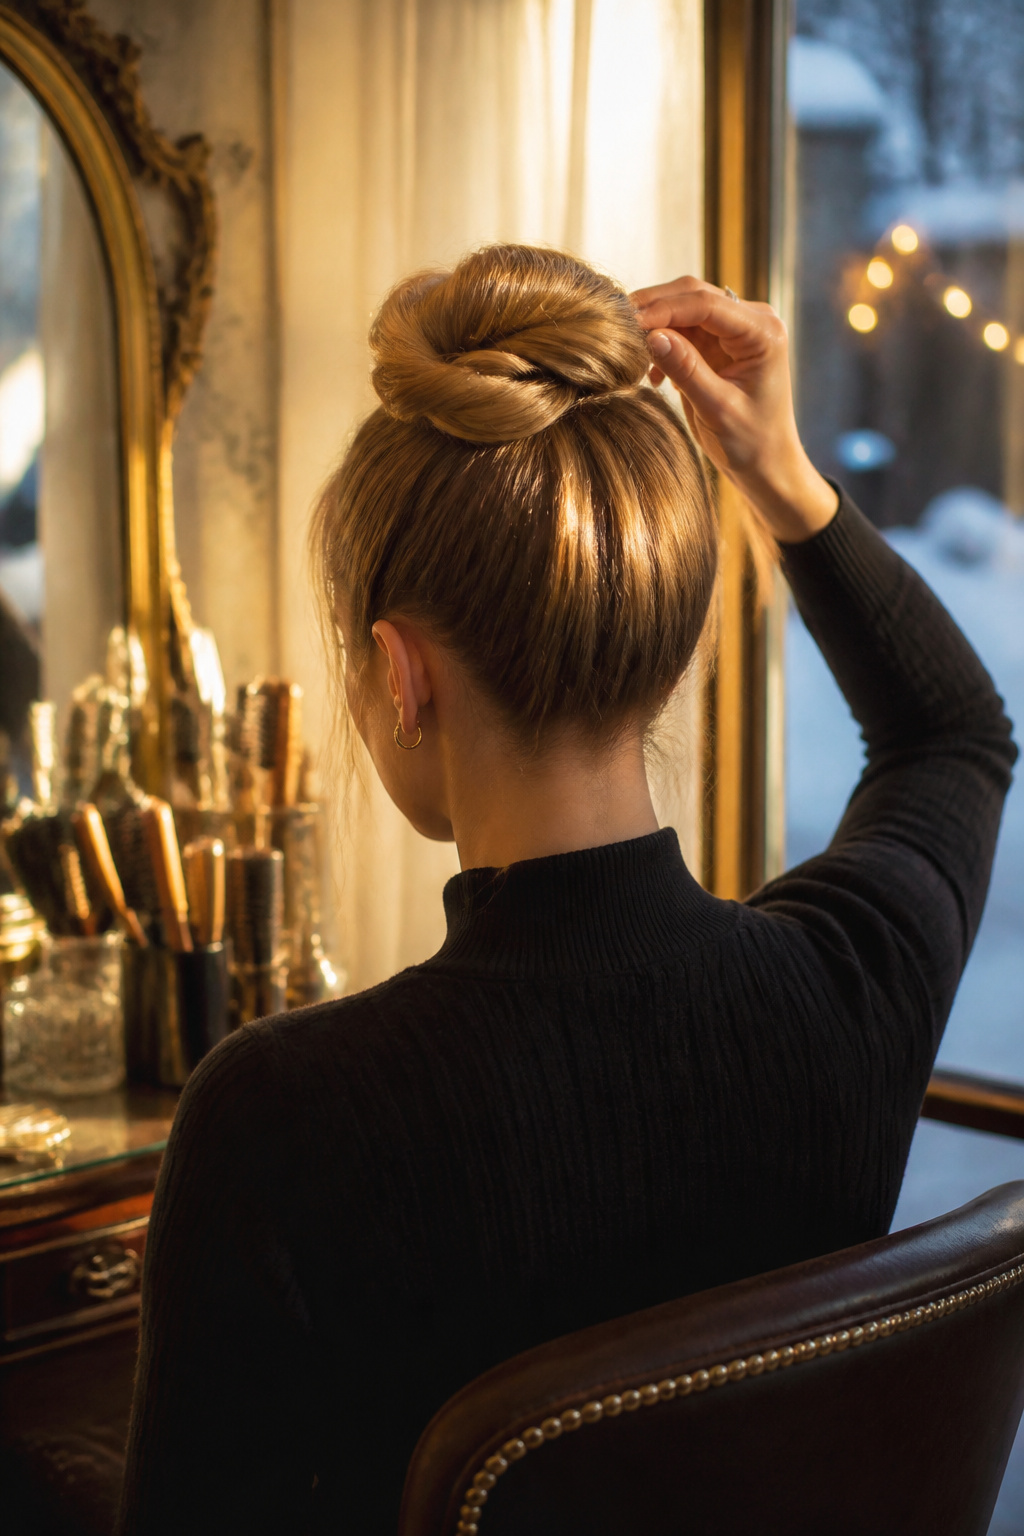
A high ponytail twisted and wrapped into a bun at the crown solves the shape problem bulky winter coats create. The height sits above a puffer collar or wool scarf, so the silhouette reads as intentional rather than swallowed. I learned this the hard way after one too many mornings of a low bun flattening against my coat until it looked like an afterthought.
The wrapped structure earns its keep on days when you are in and out of hats. A simple bun loosens at the base and picks up static; the twist-and-wrap method pins each layer against the next, so the whole thing holds together even when the hat comes off. Five to six pins, placed where the twist crosses itself, are usually enough. I have done it with four in a rush and paid for it by noon.
The placement matters more than the technique. Too far back and the coat still wins; too far forward and you are wearing a topknot, which is a different style entirely. The sweet spot sits where the skull starts to curve downward toward the forehead. Finding that point on your own head takes one mirror check, but it is worth doing before the first pin goes in.
15. Smooth Low Ponytail with Silk Wrap
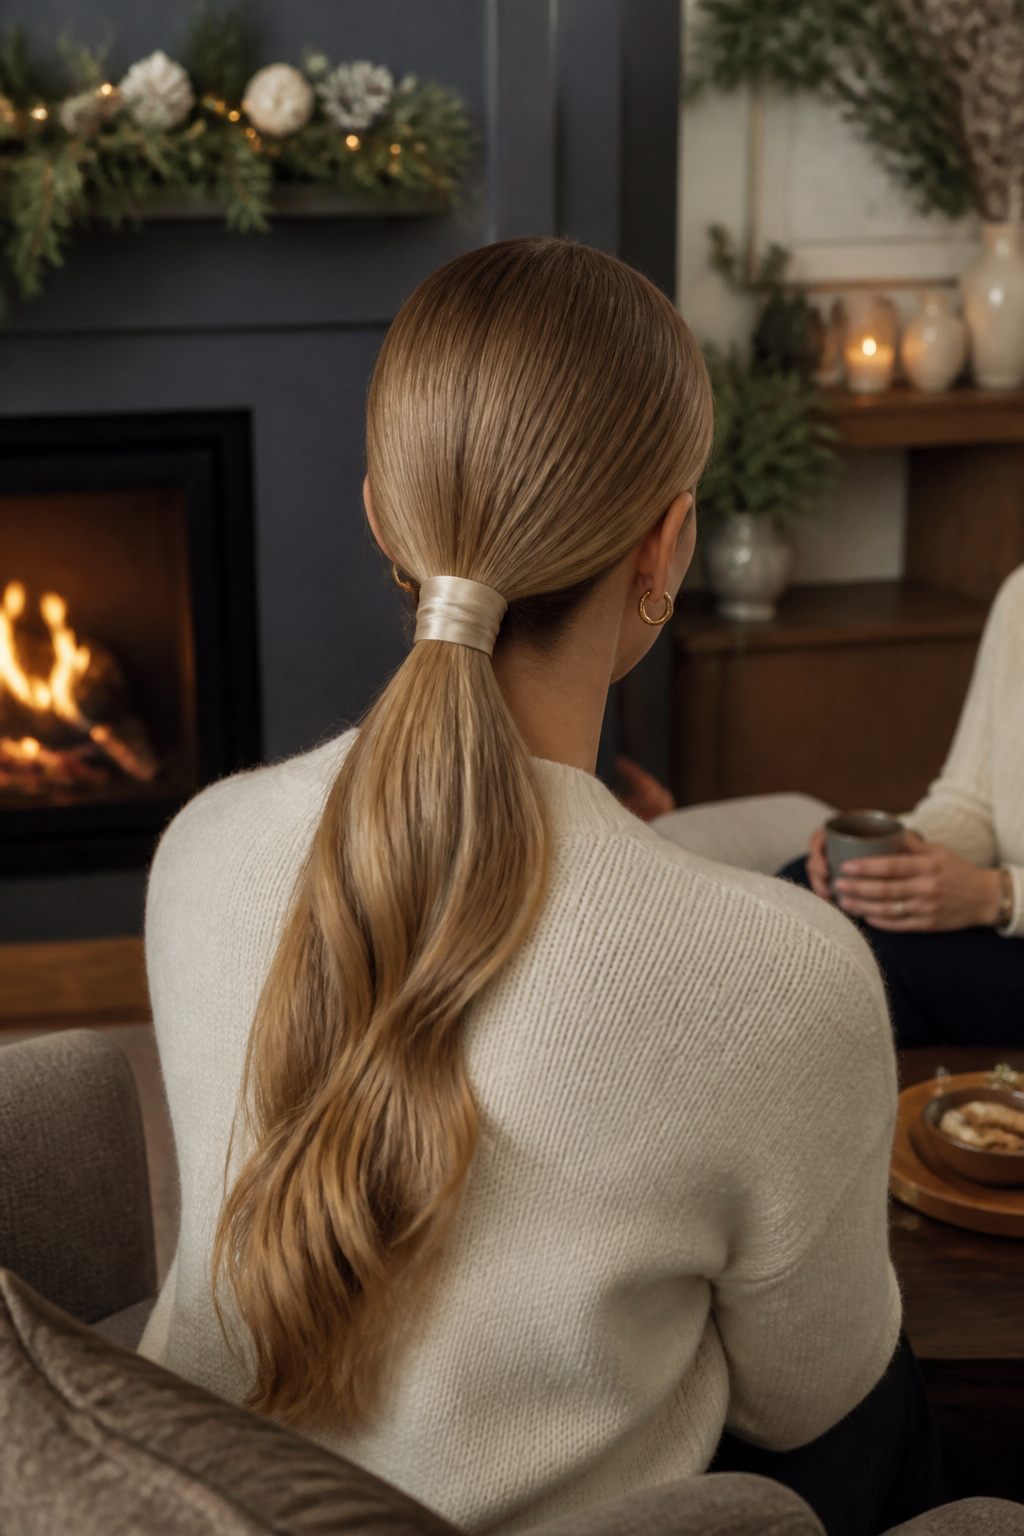
A smooth low ponytail with a silk wrap solves two winter problems at once. The low placement sits below where a hat band presses, so you skip the crease a high elastic leaves after a morning commute. The silk strip, tied snug around the base, hides the elastic and cuts friction against coat collars and scarf knots that rough up the hair shaft in dry air.
Straightening first gives the clean surface this look needs. Pull the ponytail at the nape, wrap with a silk strip tight enough to stay, loose enough to avoid tension at the roots. A glossing product through the lengths adds protection against the cold without weighing the style down.
16. High Puff
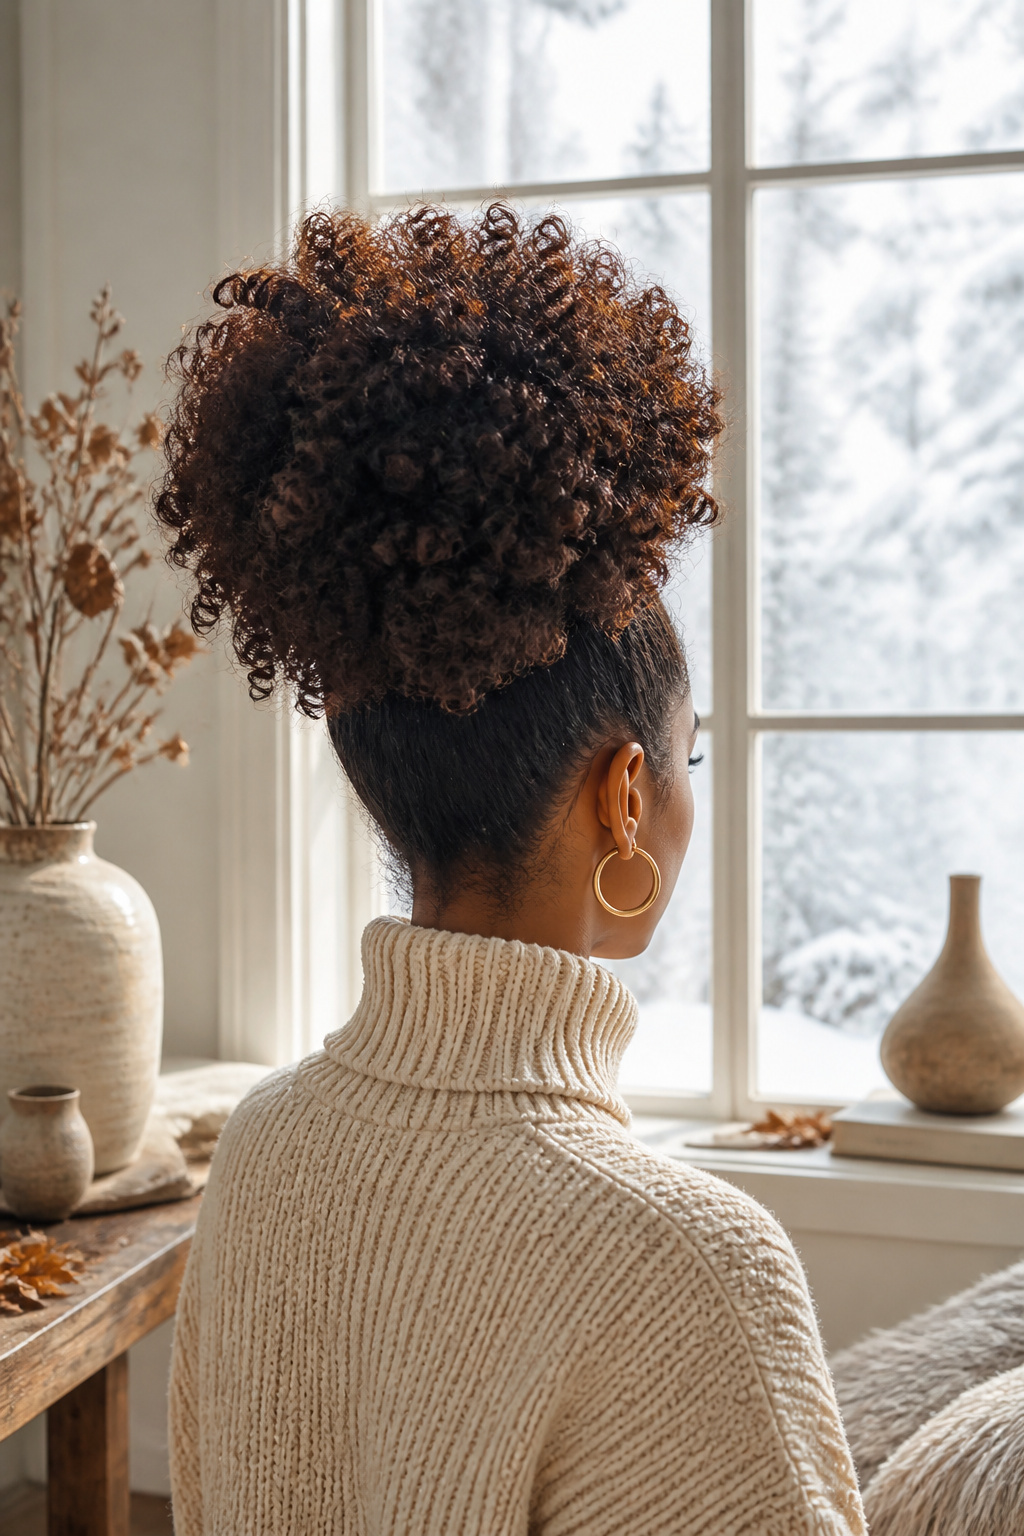
The high puff gathers everything at the crown and lifts it into a rounded shape, working with natural texture instead of flattening or frying it. In winter that matters more than people admit; cold air outside and dry heat inside already leave hair brittle, so adding daily blow-drying or pressing on top is where the breakage starts.
I used to think a puff needed to be blown out first. A hydrating leave-in conditioner on damp hair, then air-drying or diffusing, gives the same height without the damage. A silk scrunchie holds it without the snapping I got from tighter elastics. For flyaways along the edges, a small amount of edge control gel or a cream designed for 4c coils smooths without stiffness.
The shape itself is adjustable. A pick or your fingers add volume after the band is in place; how round or elongated the puff gets depends on where you place the gather and how much you lift the roots. What I like is that it takes about five minutes once the hair is dry, which in winter means less time with wet ends against a wool coat collar.
17. Diffused Curls
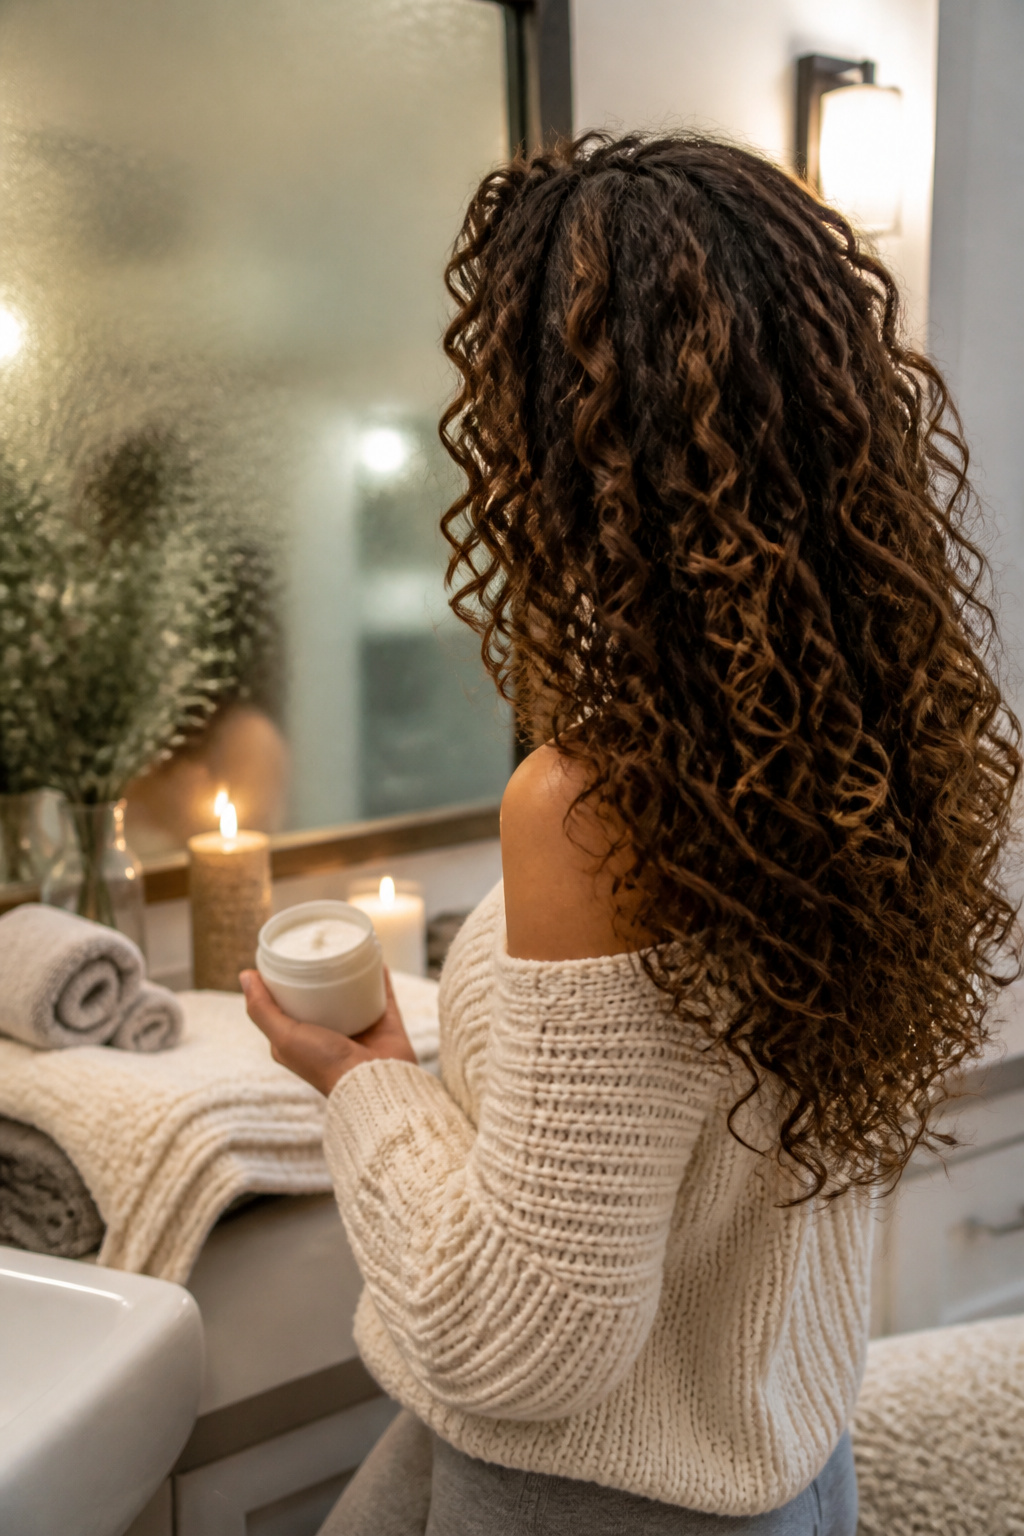
A diffuser attachment reshapes how winter air meets wet curls. The bowl-shaped fingers spread heat across a wide surface instead of shooting a narrow, stripping blast, which matters when the air outside is already doing half the drying work and taking moisture with it. The result is defined, separated ringlets without the frizz that comes from forcing curls to set while they’re still losing water too fast.
The method is slow by design. Hair goes in damp, not dripping, with a styling cream or a few drops of argan or jojoba oil worked through first. You hold the diffuser still against each section until the heat penetrates, then move on. Rushing this, moving the dryer the way you would with a concentrator nozzle, breaks up the curl pattern and invites the exact fuzz you’re trying to avoid. I stop at about 80% dry, let the last bit happen in the room air, then shape with my fingers. A light-hold spray finishes it if the day is long or the hat comes on and off.
18. Bantu Knots
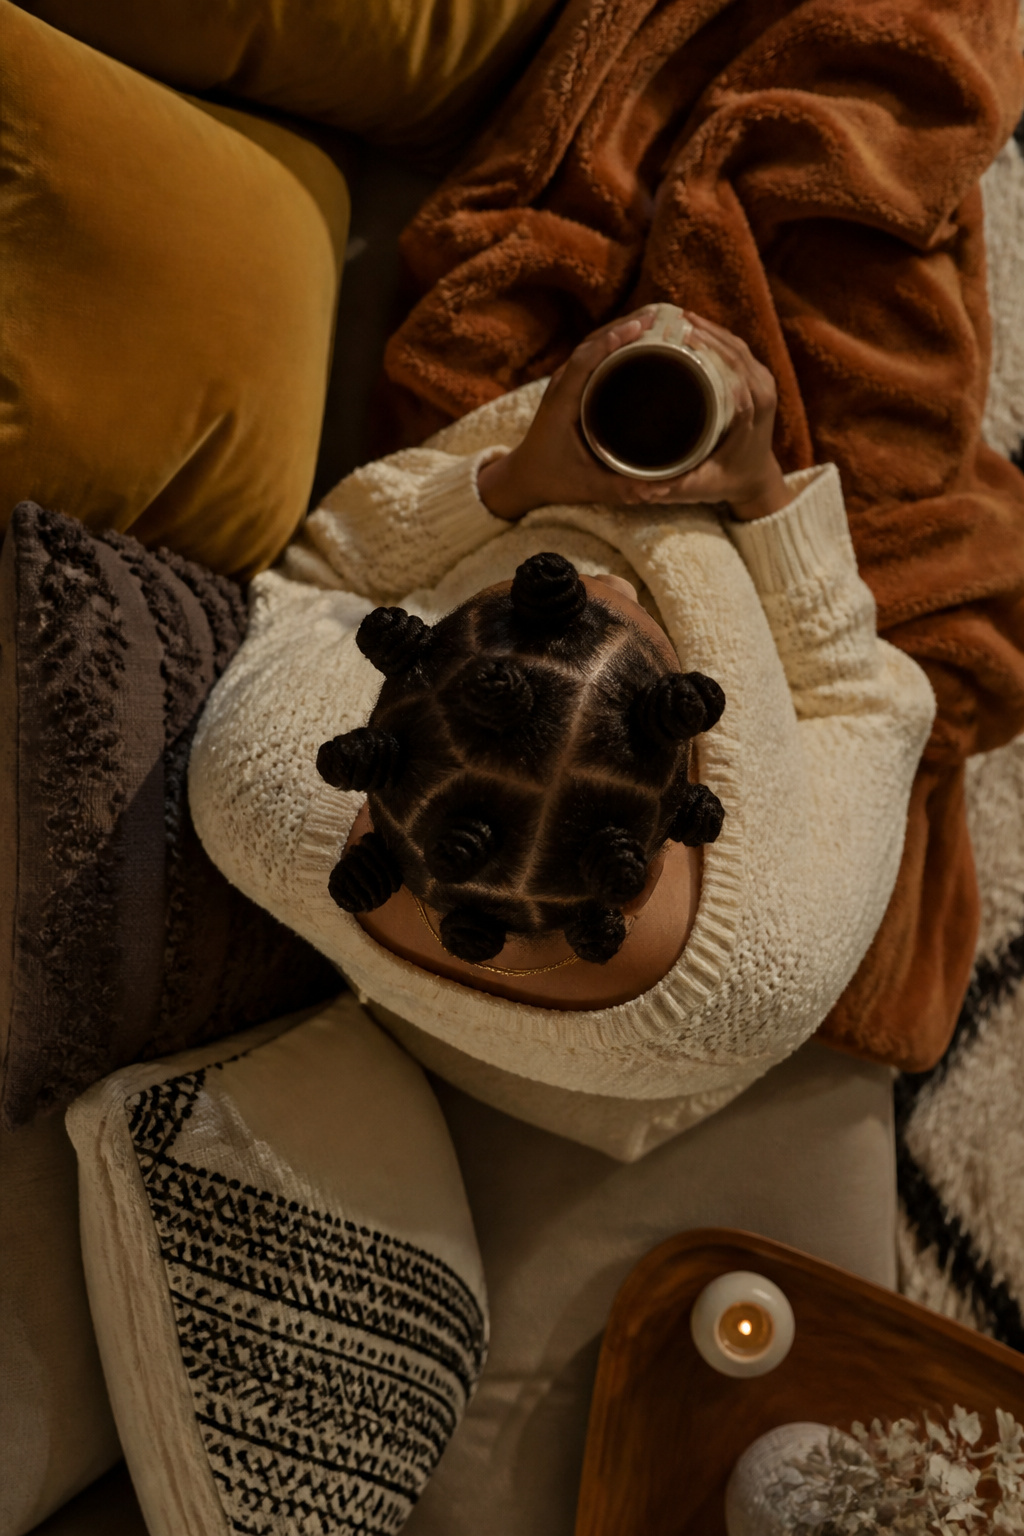
Small, coiled knots pinned to the scalp do two jobs at once: they read as a finished style on their own, or they work overnight to set curls that unravel into definition by morning. Either way, the hair stays tucked away from dry air and fabric friction for days, which matters more once the heating clicks on and wool scarves start rubbing at the ends.
The setup is straightforward. Section the hair with a tail-end brush, twist each part tight, and wrap it into a knot no larger than a walnut. Secure it with a bobby pin or small bobble; acrylic thread holds longer if the plan is to leave them in for weeks rather than days. Damp hair sets the curl harder, dry hair gives a softer wave when they come down.
Winter is where this style earns its keep. Heat styling every morning against static and hat-hair only adds brittleness to hair already fighting dry air. Bantu knots skip the tools entirely, and the low manipulation means less breakage at the exact season when hair is most prone to it. Let them set a few hours, or sleep in them; fluff after takedown if volume is the goal, or leave them coiled and walk out as-is.
19. Braided Updo
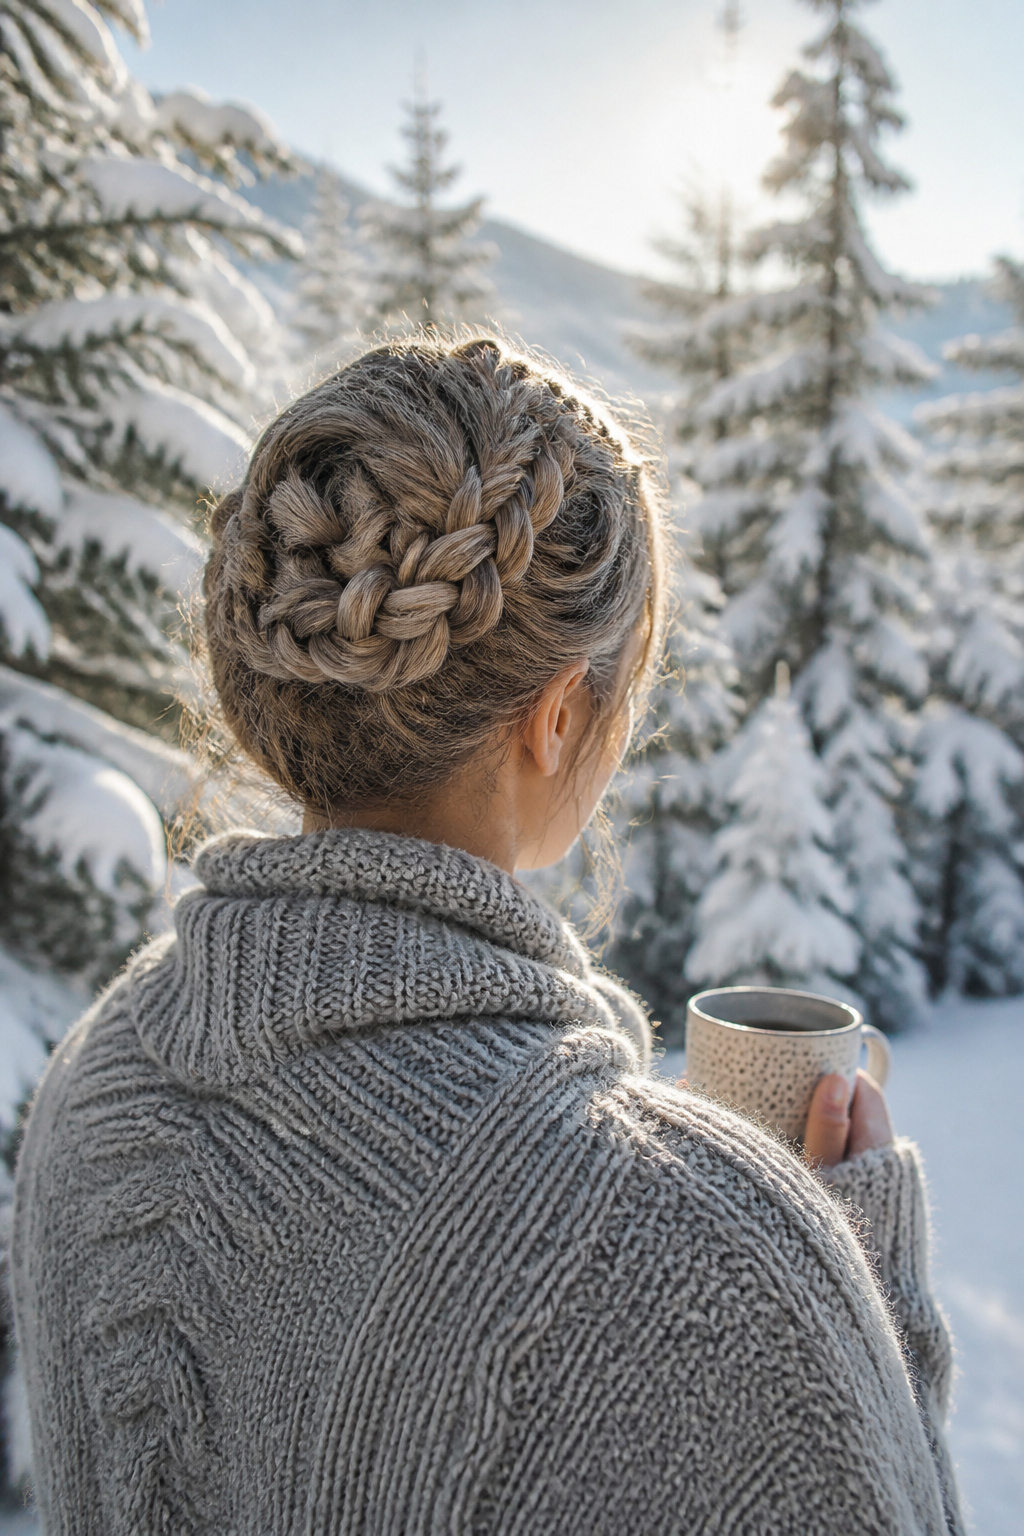
Multiple small braids gathered and pinned into an updo shape spread tension across many sections instead of pulling from one tight point. The braids themselves become the surface texture, so the style looks deliberate even when the finish is loose. In brittle winter conditions, that distributed tension matters; edges stay protected when no single strand bears the full stress of the style.
Classic three-strand braids work, or more intricate patterns if the extra time fits your morning. The key is pinning the gathered sections so the weight sits evenly. Bobby pins placed where two braids cross hold longer than pins driven straight through one plait. Dutch braids or French plaits both behave well here, since their structure grips the scalp and resists the flattening that happens under a hat.
This is where I split on purpose: a neat bun-like arrangement reads polished for a holiday gathering, but the same technique with ends left free and fewer pins gives a softer shape for ordinary days. The polished version wants a finish of hairspray; the softer one usually does not. Winter wind will loosen either slightly by evening, and on the softer shape that loosening looks intentional rather than failed.
20. Ombre
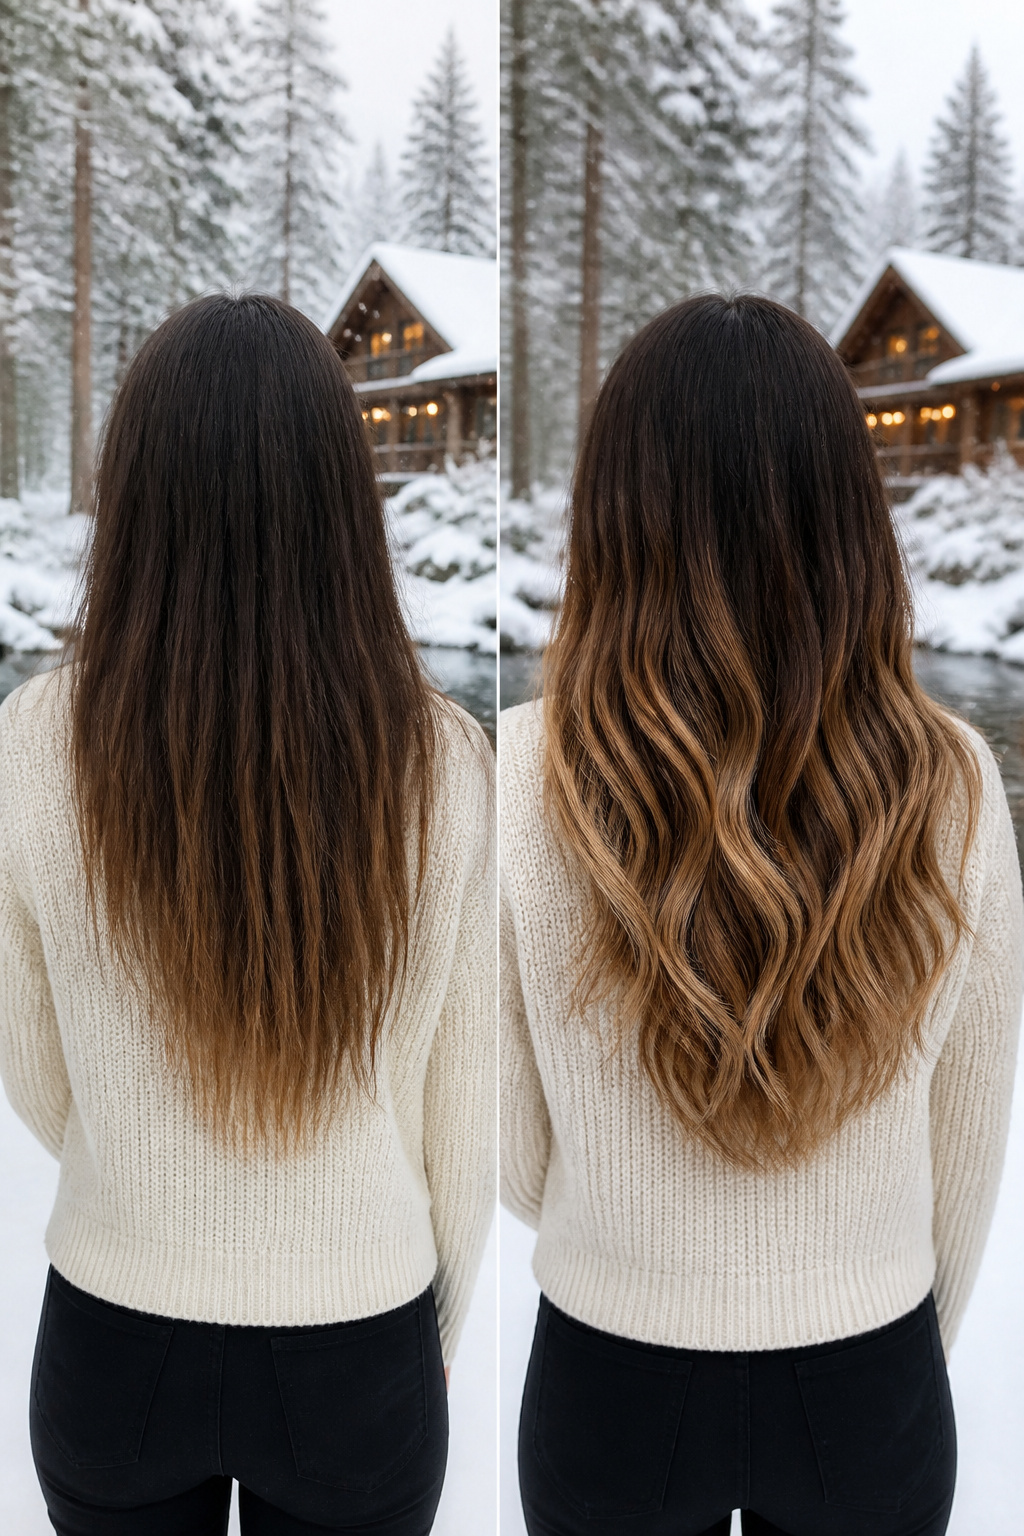
A winter ombre lives or dies by the tone pairing. Deep brunette roots that fade to caramel or ash blonde ends carry the season without reading like a leftover summer bleach job. The gradient does the maintenance work for you: darker roots at the scalp mean three to four extra weeks between salon visits, which matters when a snowstorm turns a simple appointment into an expedition.
Color melting, the technique that blurs where one shade becomes the next, keeps the transition from looking like a harsh stripe as it grows. Gloss services such as Redken Shades EQ can refresh the midlengths without a full redo, enriching what’s already there instead of stripping and starting over. Warm caramel ribbons against a brunette base reflect indoor light better than ashy tones, adding the depth that flatters pale winter complexions. If you are deciding between cinnamon brunette and something cooler, the warmer option wins from December through March; it reads intentional rather than faded.
Winter Hair Care
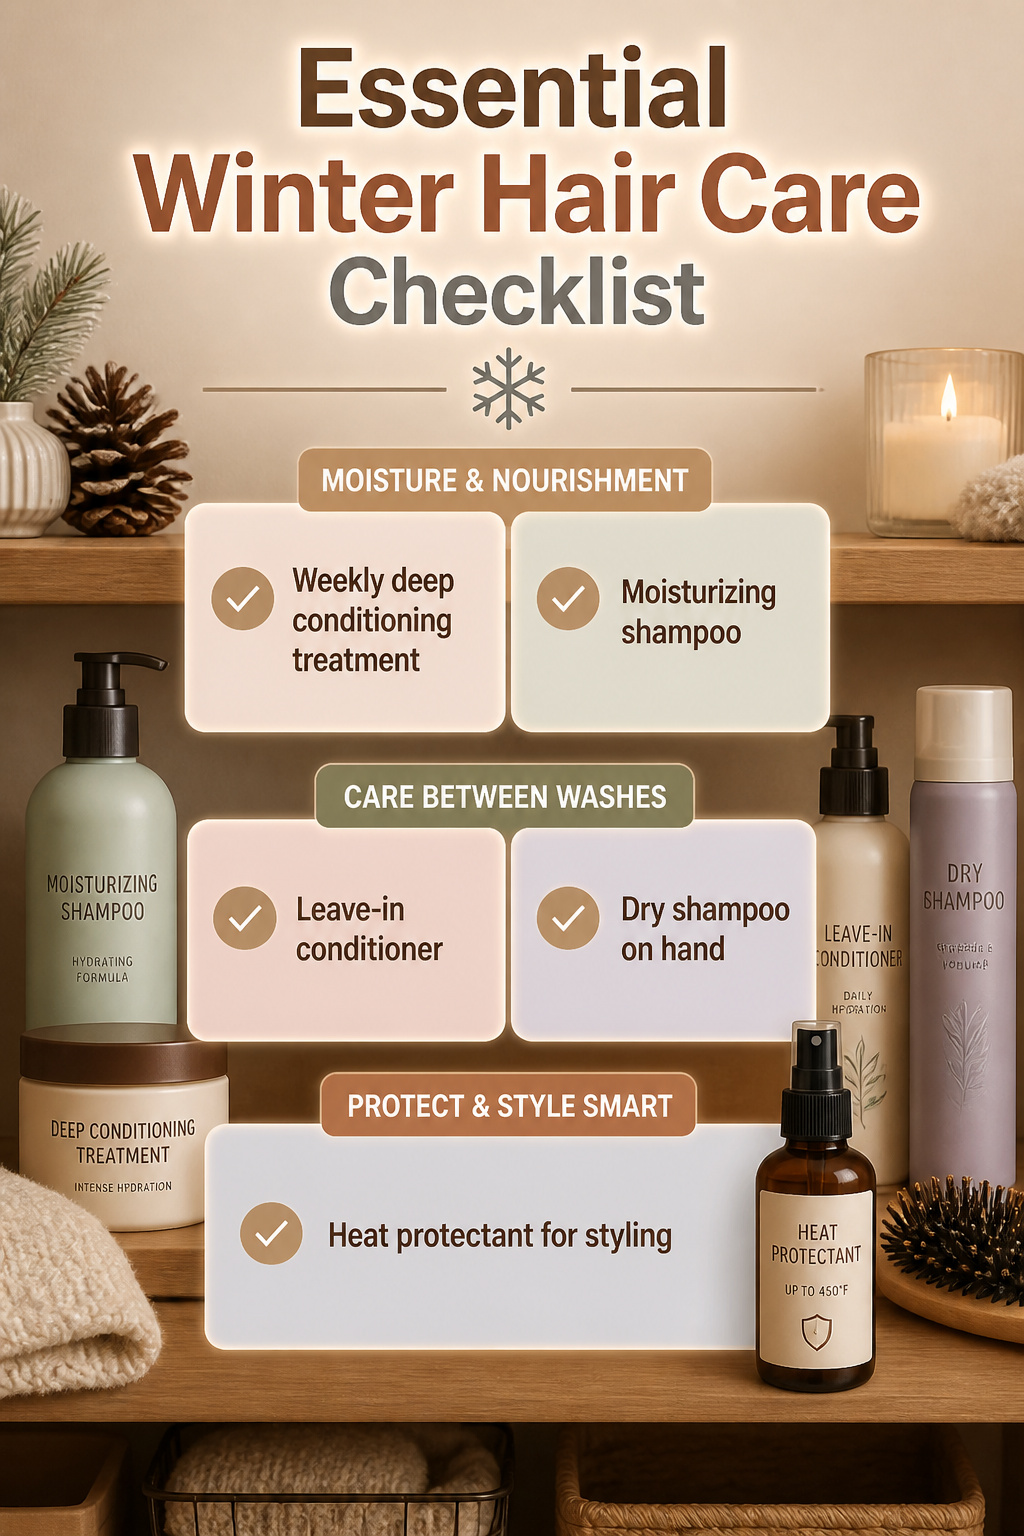
Cold air outside and heated air inside strip moisture from every strand, which is why a weekly deep conditioning treatment is non-negotiable if you want any winter style to hold its shape. I learned this the hard way after watching a blowout turn to static and split ends by New Year’s. The fix starts in the shower: switch to a moisturizing shampoo and follow with a conditioner designed to lock hydration in, not just smooth the surface for a rinse. For hair that already feels like straw, a leave-in conditioner or a light hair oil applied to the ends keeps working between washes. Fine or straight hair needs the lightweight versions, and only from mid-length down; anything heavier flattens the whole style. Curly and coily textures need more, and more often, to keep curl definition from disappearing into frizz. Wash less frequently in winter, use lukewarm water instead of hot, and keep a dry shampoo on hand for the days between. Heat styling only adds to the damage, so if the flat iron or curling wand is unavoidable, a heat protectant rated to 450°F goes on first.
Protective Styles
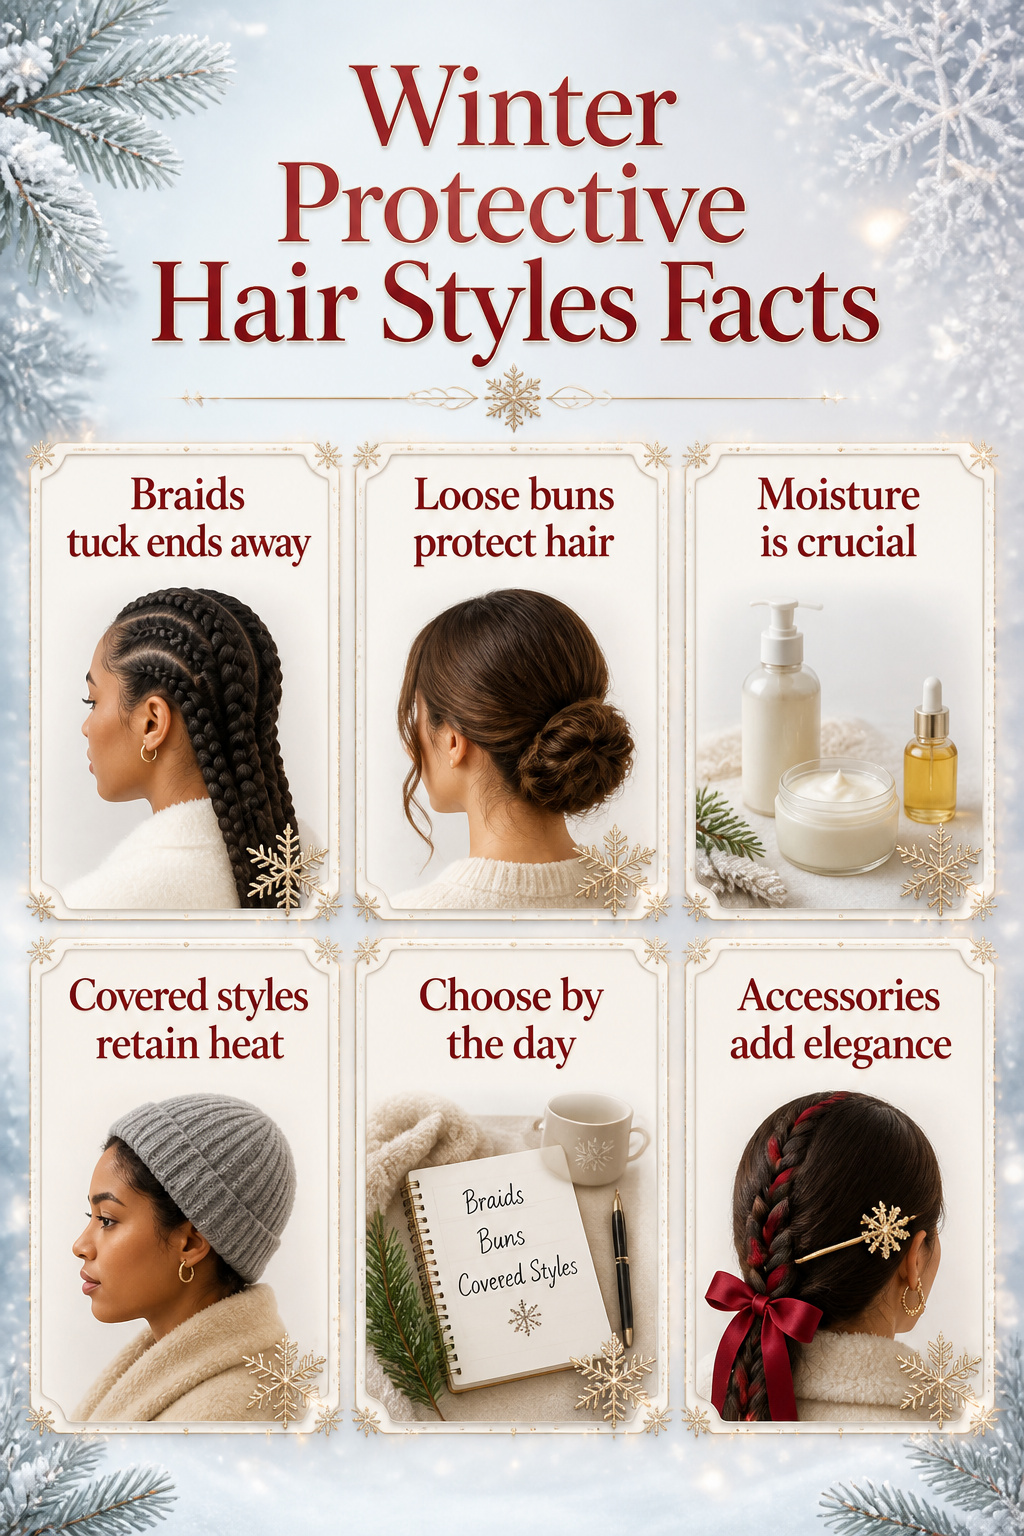
Cold winter air strips moisture from exposed strands, which is why braids, buns, and covered styles earned their place among the fantastic hair designs for winter worth keeping in rotation. Braids tuck ends away from wind that snaps weakened hair; the tension matters, though. Too tight, and the style becomes the source of breakage rather than the shield against it. Buns serve the same protective function with less time invested, especially the low, loose versions that do not pull at the hairline. What convinced me, reading through the guidance on this, was the emphasis on pairing the style with moisture rather than treating the style as the whole solution. A braid on dry hair still fractures; a braid on conditioned hair holds its integrity. Covered styles add another layer, trapping body heat and humidity close to the scalp while blocking the dry air entirely. The choice between them depends on the day: braids for consecutive wear when you want to wake up with the work already done, buns for single-day polish, covered styles for the coldest commuting mornings when the wind cuts hardest. Accessories help the transition. Ribbons woven through a braid or a stick securing a bun turn the practical move into something intentional enough for a holiday gathering without undoing the protection.
Trending Winter Hair Colors
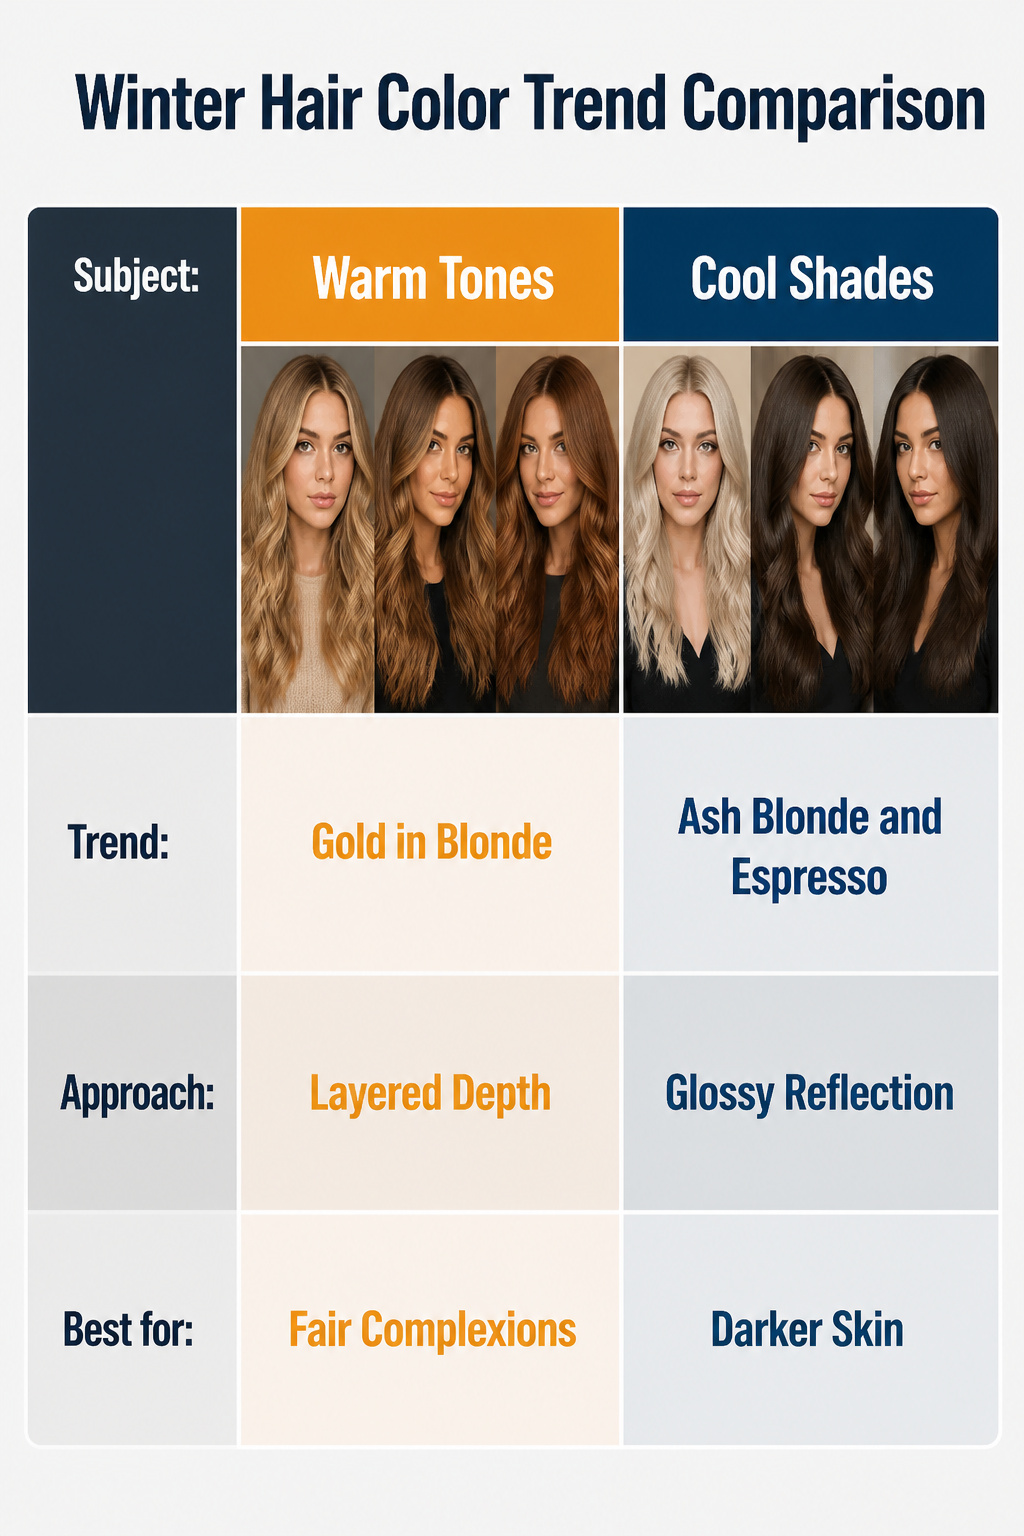
Warm tones are dominating this winter, and after reading through what stylists are actually booking, the shift makes sense. Five years ago, the push was toward ashy, near-silver blondes. Now, gold is back in blonde hair by specific request, with caramel ribbons and cinnamon brunette bringing sun-kissed depth that reads as expensive rather than summery. Biolage celebrity stylist Danielle Keasling puts the timeline plainly: the platinum obsession has reversed, and clients want warmth that catches what little light December offers.
Cool shades still hold ground, though the choice splits by what you’re solving. Ash blonde and espresso work for anyone whose skin fights redness, while the deeper brunettes, chocolate browns, reflect light with a gloss that flatters under gray skies. The common thread across both directions is dimension. Color melting, where shades blend so smoothly you cannot find the seam, gives that bespoke result. For reds, the nuance matters more than the commitment. Strawberry blonde suits fairer complexions; burgundy goes deeper on darker skin. Auburn sits in the middle as the accessible entry point. What convinced me, reading the seasonal breakdowns, is that the best winter color is not warm or cool but layered enough to survive flat light.
Frequently Asked Questions
What are the best winter hairstyles?
Braids, buns, soft waves, and polished ponytails rank among the most reliable fantastic hair designs for winter. Braided crowns and low buns protect strands from scarf friction and dry air, while bouncy blow-dries and winter waves hold their shape even after you pull off a beanie. The article covers twenty specific styles, from quick messy top knots to structured high ponytails with wrapped buns, each chosen to survive cold air, indoor heating, and wool layers.
How can I protect my hair during winter?
Switch to a moisturizing shampoo, follow with a conditioner that locks hydration in, and apply a weekly deep conditioning treatment without skipping it. A heat protectant before any iron work is non-negotiable, and finishing with a lightweight oil or serum seals the cuticle against dry indoor air. For protective styling, braids, buns, and Bantu knots tuck ends away from fabric friction and cold wind, reducing breakage where it typically spikes in January.
What hair colors are trending this winter?
Warm tones dominate this season, with cinnamon brunette and caramel balayage replacing ashy shades from December through March. Cherry cola reds add depth for holiday gatherings, while color melting blurs the transition between shades so you gain three to four extra weeks between salon visits. Cooler options like ash blonde and snow blonde still appear, though they read better in summer; winter light flatters warmer ribbons that reflect indoor lamps and flatter paler complexions.